Last updated: November 19, 2026
Key Takeaways
- Match fabric, needle, thread, and stitch length before sewing.
- Thread correctly, choose the right needle, and test on the same fabric layers.
- Use straight, stretch, or longer topstitch settings for the seam type.
- Fix needle, tension, stitch length, or support in that order.
Machine sewing setup and stitch control — The Complete Guide is the process of threading the machine, matching the needle and thread, setting tension, and testing stitches on scrap before you sew the real fabric.
A good starting point is a test seam that uses the same fabric layers and the same stitch you plan to use, often with a 2.5 mm default on many domestic machines.
The steps below settle what to do first, what to change when stitches misbehave, and how to stop chasing one problem by fixing the wrong dial.
What Actually Determines the Right Setup?
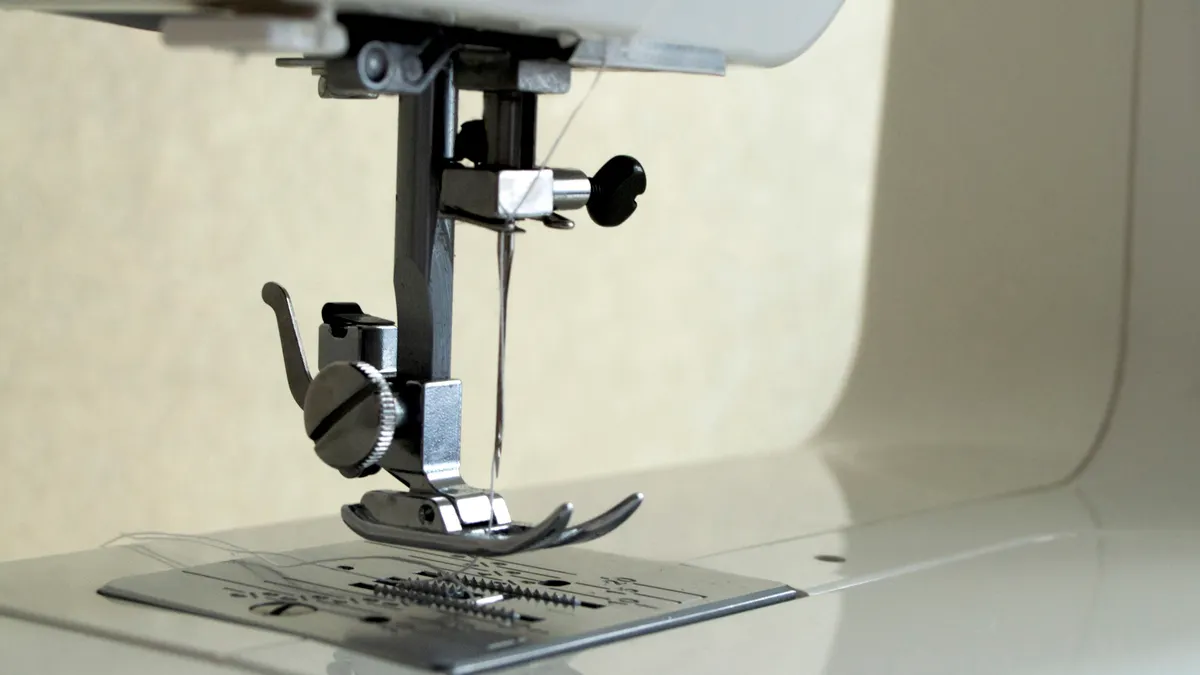
The right setup is the one that matches your fabric, needle, thread, and stitch length before you touch the project. If any one of those four is wrong, stitch control gets muddy fast. A 90/14 needle with medium-weight woven cotton may behave nicely; the same needle on chiffon or denim can create snags, skipped stitches, or ugly holes.
Picture this: you sit down with a new project, and the machine is threaded, but the top thread keeps pulling tight on the underside. You start turning random knobs. Don’t. Tension is only one part of the system, and the needle size, thread path, presser foot pressure, and stitch length all shape the result.
Start with this order:
- Install the right needle for the fabric.
- Put in fresh thread that fits the needle eye.
- Thread the machine with the presser foot up.
- Bring the bobbin up and check both threads.
- Sew on scrap and inspect the top and back.
- Change one thing at a time.
That last rule matters. If you change thread, needle, tension, and stitch length together, you won’t know which fix worked.
Here’s the catch: the machine can be “set up” and still sew badly if the presser foot is wrong for the job. A zipper foot, walking foot, and standard zigzag foot each control fabric in a different way, and the wrong foot can make feeding look like a tension problem.
Quick check: if you’re guessing instead of testing on scrap, your setup isn’t done yet.
How do I set up a machine so the stitches are balanced?
You set it up by threading correctly, selecting the right needle, and testing on the same fabric layers you plan to sew. That is usually the quickest route to a balanced stitch, and it is more reliable than chasing the tension dial blindly.
Picture this: you’ve got a cotton shirt hem or a tote bag seam, and the top thread looks fine until you fold the fabric into two layers. Then the bobbin thread shows on top, or the seam tunnels. That usually means the setup matched a single layer, not the real seam.
Use this path:
- Raise the presser foot and rethread the upper thread from the spool pin all the way to the needle.
- Confirm the bobbin is wound evenly and sits in the case the correct way for your machine model.
- Insert a new needle, flat side positioned correctly for the machine, and push it fully up before tightening.
- Select a straight stitch for most seams and begin with the manufacturer’s default stitch length, often around 2.5 mm on many domestic machines.
- Hold the thread tails for the first 2 to 3 stitches so the machine doesn’t swallow them into the bobbin area.
- Sew 10 to 15 cm on scrap that matches the project layers, then inspect both sides under good light.
- Adjust only one variable: top tension, stitch length, needle size, or presser foot choice.
If the top thread is too tight and the bobbin thread peeks through on top, loosen the top tension a little. If the fabric puckers, use a longer stitch and check foot pressure before touching the bobbin tension. Bobbin tension is not your first move on most home machines; it’s the last one.
A clean stitch line often comes from boring basics, not magic settings. A fine needle for fine fabric, a heavier needle for dense cloth, and a test seam on scrap tell you more than a full hour of knob turning.
Quick check: if your test seam still looks bad after one small change, stop and inspect threading and needle placement first.
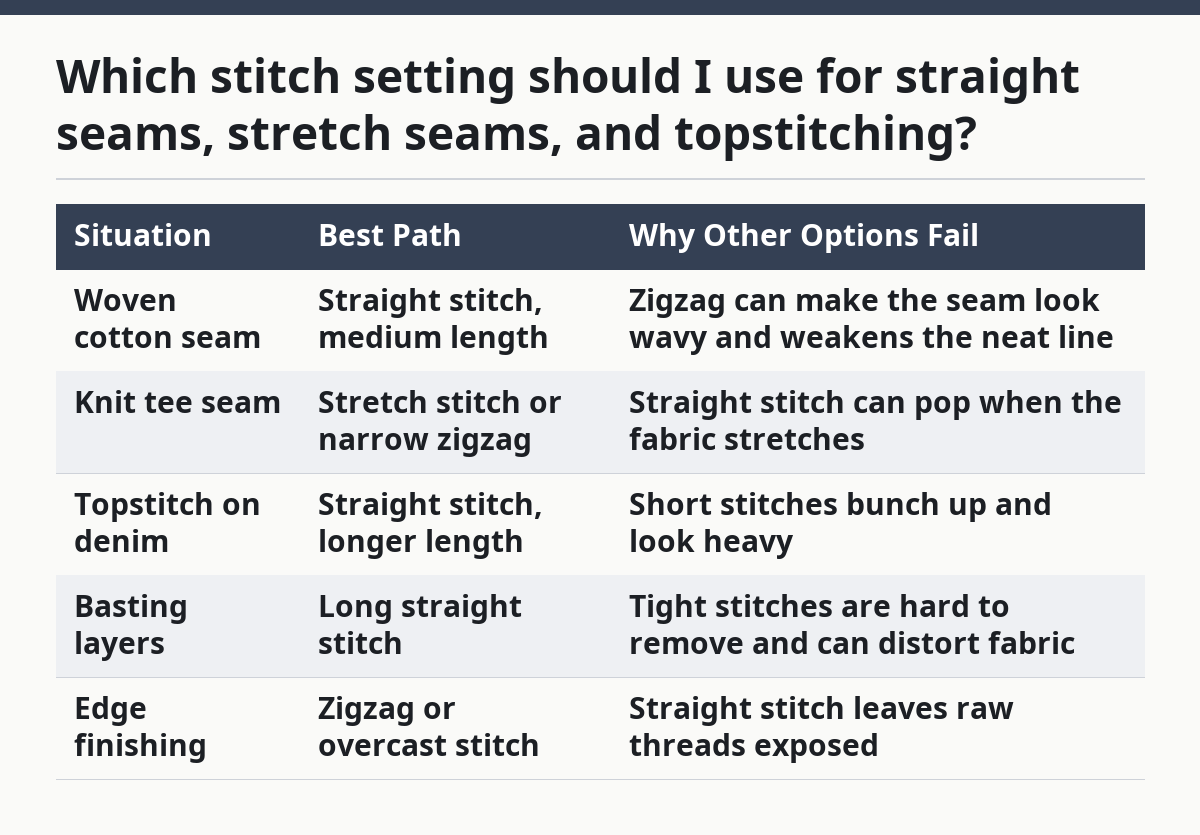
Which stitch setting should I use for straight seams, stretch seams, and topstitching?
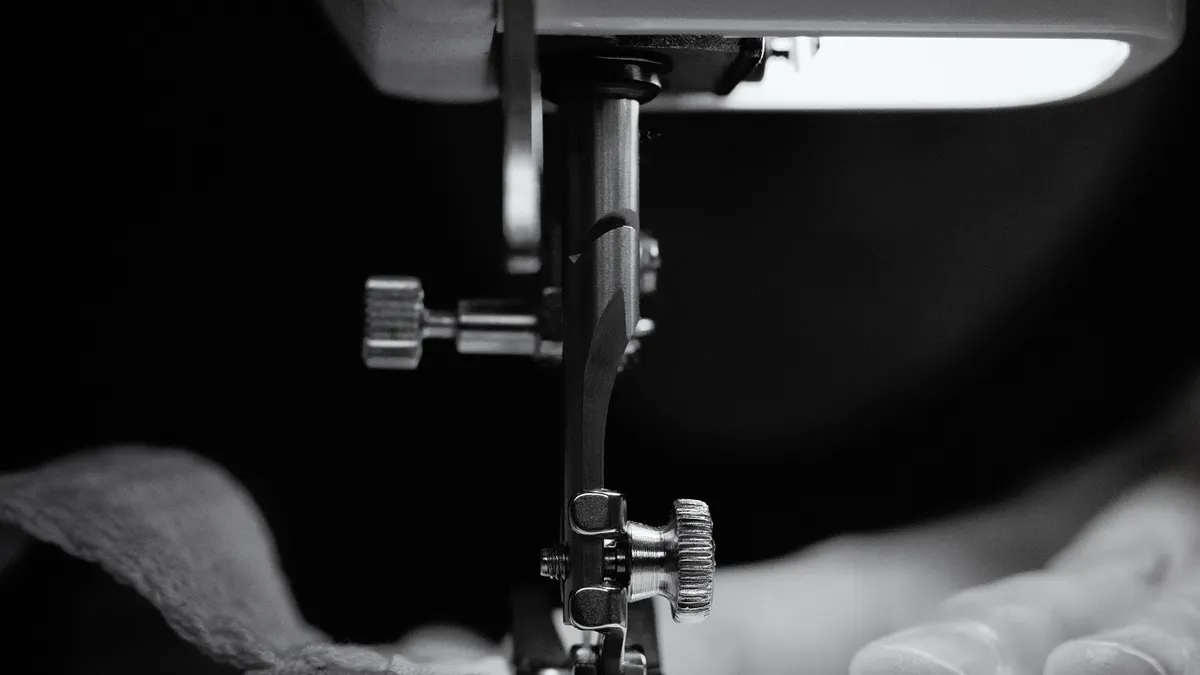
Use a straight stitch for woven seams, a stretch stitch or narrow zigzag for knit seams, and a longer straight stitch for topstitching. The exact choice changes with fabric stretch, seam load, and whether the seam needs to stay flat or give a little.
Picture this: you’re hemming a knit T-shirt and the seam pops when you pull it over your head. That’s not a thread problem alone. It means the seam needs stretch, usually from a stretch stitch, a narrow zigzag, or a serger-style finish if the machine supports it.
Here’s a quick decision table:
| Situation | Best Path | Why Other Options Fail |
|---|---|---|
| Woven cotton seam | Straight stitch, medium length | Zigzag can make the seam look wavy and weakens the neat line |
| Knit tee seam | Stretch stitch or narrow zigzag | Straight stitch can pop when the fabric stretches |
| Topstitch on denim | Straight stitch, longer length | Short stitches bunch up and look heavy |
| Basting layers | Long straight stitch | Tight stitches are hard to remove and can distort fabric |
| Edge finishing | Zigzag or overcast stitch | Straight stitch leaves raw threads exposed |
A few settings matter more than beginners think:
- Stitch length: shorter stitches grip more; longer stitches lie flatter.
- Stitch width: only matters on zigzag and decorative stitches.
- Thread tension: if too tight, seam puckers; if too loose, loops show.
- Feed rate: a steady speed helps more than a fast one.
Topstitching needs a calmer hand and often a topstitch needle. That needle has a larger eye, which helps heavier topstitch thread move without shredding. If the thread is thick and the needle eye is tiny, the machine may skip or fray the thread.
On the flip side, decorative stitches are not the fix for every visible seam. They can be lovely on a cuff or edge, but they are a bad choice for a seam that must open and flatten under stress.
Quick check: if the seam must stretch, don’t force a straight stitch to do a stretch stitch’s job.
What do I change when stitches look wrong?
Change the needle, tension, stitch length, or fabric support in that order, because those are the four fixes that solve most stitch problems. If you start with bobbin tension or random presser foot changes, you’ll waste time and often make the stitch worse.
Picture this: the seam looks neat on top, but the underside is full of loops. Or the machine is making tiny bird nests under the fabric. That often points to threading, tension, or starting technique, not a mysterious machine failure.
Use this rule set:
- If you see loops on top, tighten top tension a small amount.
- If you see loops on the underside, rethread the top path with the presser foot up.
- If the fabric puckers, lengthen the stitch to around 3 mm and test again.
- If stitches skip, change the needle first.
- If the fabric drags or shifts, change the presser foot or add stabilizer.
- If thread frays, match the needle size to the thread and fabric.
Common stitch faults and likely causes:
| Symptom | Likely Cause | First Fix |
|---|---|---|
| Loops underneath | Upper thread not seated, or top tension too loose | Rethread upper path |
| Loops on top | Top tension too loose | Tighten top tension slightly |
| Puckered seam | Stitch too short, tension too tight, or fabric feeding unevenly | Lengthen stitch and reduce top tension |
| Skipped stitches | Dull needle, wrong needle type, or poor needle insertion | Replace needle |
| Fabric bunching | Foot pressure too high or feed dogs struggling with layers | Reduce pressure if adjustable, or use walking foot |
| Thread shredding | Needle eye too small or damaged needle | Use a larger or new needle |
Here’s the catch: a bobbin that is wound badly can create false tension problems. If the bobbin is lumpy, too loose, or overfilled, fix that before touching the tension dial.
A clean stitch often appears after one small repair, not a dozen. Change one thing, sew 10 cm on scrap, inspect, repeat. That’s the workflow.
Quick check: if you can’t name the symptom first, you’re not ready to adjust the machine.
How do I control stitch length, speed, and fabric feed?
You control stitch quality by keeping stitch length steady, sewing at a speed you can steer, and helping the fabric feed without pushing it. The machine’s feed dogs move the fabric; your hands only guide it.
Picture this: you’re trying to sew a curved neckline or a long straight seam, and the line wanders because the machine is moving faster than your hands can correct. That’s a speed problem, not a talent problem. Lower speed gives you time to keep the fabric edge aligned with the seam guide.
Use these controls:
- Stitch length: around 2.5 mm for many general seams, longer for topstitching, shorter for fine detail or gathering.
- Hand position: place one hand before the presser foot and one behind it, but don’t pull.
- Speed control: start slow at corners, curves, and seam starts.
- Guides: use the needle plate marks or a seam guide for straight seams.
- Fabric handling: let the feed dogs move the cloth; only steer.
For slippery fabric, a walking foot or a longer basting stitch can help. For thick seams like jeans hems, you may need to raise the presser foot level at the start of the hump, then hand-crank over the thick part if your machine struggles. A hump jumper or folded scrap can help a lot here.
The truth is, most beginner stitch problems are feeding problems disguised as tension problems. If the top layer shifts faster than the bottom, you get uneven seams. If you shove the fabric, the needle bends slightly and the line wanders.
A practical rhythm:
- Line up the starting point.
- Lower the needle and presser foot.
- Hold the thread tails for a few stitches.
- Sew 2 to 3 slow stitches.
- Speed up only once the seam is stable.
- Slow down again before the end or a corner.
Do not tug the fabric to “help” it move. That can distort the stitch length and fight the feed dogs.
Quick check: if your stitches look uneven only when you speed up, the fix is slower hands, not tighter tension.
What should I do for thick seams, knits, and slippery fabric?
Use different setup rules for each fabric type, because cotton, knit, denim, and silk fail in different ways. The same machine settings that work on quilters’ cotton can ruin a jersey hem or crush a silk seam.
Picture this: you switch from a cotton pillowcase to denim pockets, then to a knit cuff, and the machine acts like three different machines. That’s normal. Fabric weight, stretch, and surface grip change how the needle enters and how the feed dogs bite.
If you’re sewing thick seams
Use a heavier needle such as 100/16 or 110/18 if the thread and machine support it. Short seams of thick layers often need a longer stitch and a slower approach to the hump. If the presser foot tilts, add a leveling aid or sew from the thinner side into the thicker side.
If you’re sewing knits
Choose a ballpoint or stretch needle and a stitch that can move with the fabric. A narrow zigzag or stretch stitch usually works better than a straight stitch. Test the seam by gently stretching it after sewing; if the stitches pop, the seam needs more give.
If you’re sewing slippery fabric
Use a fine needle, sharp point, and a slightly longer stitch. Keep the fabric flat and avoid dragging it. Tissue paper or stabilizer can help on the first pass, then tear away later if needed.
If you’re sewing bulky intersections
Trim seam allowances where the pattern allows it, press layers in opposite directions, and approach the bulk from the flattest possible angle. Many machines handle a 2- to 4-layer hump better if you keep the needle down, lift the foot, pivot, and nudge the fabric forward carefully.
Here’s a fabric-to-setting table:
| Fabric Type | Needle | Stitch Choice | Main Risk |
|---|---|---|---|
| Cotton woven | Universal or sharp needle | Straight stitch | Puckering if tension is too tight |
| Knit jersey | Ballpoint or stretch needle | Stretch stitch / narrow zigzag | Seam popping |
| Denim | Jeans needle | Straight stitch, longer length | Skipped stitches on thick joins |
| Silk / rayon | Fine sharp needle | Straight stitch, medium length | Snags and fabric drag |
| Canvas | Heavy-duty needle | Straight stitch | Thread strain at dense areas |
If the fabric is changing the stitch, change the setup to match the fabric. Don’t bully the cloth into your default setting.
Quick check: if the seam behaves only on one fabric and fails on another, the fabric type is the clue.
When is the standard advice wrong?
Standard advice breaks down when the machine, thread, fabric, or seam shape is outside the usual home-sewing lane. In those cases, the safer move is to stop copying generic settings and switch to a specific adjustment path, or consult a professional if the machine still will not sew correctly.
Picture this: you follow the usual “set tension to 4” advice, but your machine is an older model with a different scale, or you’re sewing specialty thread that behaves nothing like all-purpose polyester. The number on the dial matters less than the stitch result on scrap.
A few edge cases need special handling:
- Old mechanical machines: the tension scale may not match modern advice. Go by stitch appearance, not the number.
- Very fine thread: the needle eye may be too large or too rough, which can cause shredding.
- Metallic thread: it frays easily and often needs a larger needle eye, slower speed, and less friction.
- Very dense seams: the machine may need a handwheel approach instead of pedal speed.
- Decorative stitches on layered fabric: the top layer can tunnel, so stabilizer matters more than stitch choice.
- Tiny hems: a rolled-hem foot or narrow hem method can work better than a standard foot.
If the machine is skipping only on one part of the seam, inspect the needle plate, presser foot, and feed path for a snag or buildup. A linty bobbin area can make the thread path inconsistent. Clean it out before you blame tension.
The truth is, sometimes the standard straight stitch is the wrong answer. Knit fabric, stretch lace, and activewear need more give. Sometimes the machine is fine and the thread is the problem. Metallic thread can look beautiful and still be fussy enough to ruin a simple seam.
Here’s a quick decision chart:
| Situation | Best Path | Why Other Options Fail |
|---|---|---|
| Older machine with unclear tension marks | Test on scrap and ignore the dial number | The scale may not match modern tutorials |
| Metallic thread | Slow speed, larger eye needle, smooth thread path | Fast sewing frays the thread |
| Very dense seam | Slow handwheel approach, level the presser foot | Pedal speed can bend needles or skip stitches |
| Decorative stitch on layered fabric | Use stabilizer | Without support, the fabric tunnels |
| Tiny rolled hem | Rolled-hem foot or narrow hem method | Standard foot fights the fold |
Quick check: if the usual setting fails on a specialty fabric or thread, stop treating it like a normal seam.
A practical setup routine you can use every time
A repeatable routine gives better stitches than memorizing random settings, and it takes only a few minutes once it becomes habit. The point is to make the machine behave the same way before each project, not to hunt for one magic number.
Picture this: you sit down to sew and want the first seam to work, not the fifth. That’s what a routine does. It reduces the number of unknowns, and every unknown you remove makes stitch control easier.
Follow this sequence:
- Clean lint from the bobbin area and under the needle plate.
- Install a fresh needle suited to the fabric and thread.
- Check that the presser foot is appropriate for the seam.
- Thread the upper path with the presser foot up.
- Wind and insert the bobbin correctly.
- Select a stitch and start with a sane length, often around 2.5 mm.
- Sew a test seam on matched scrap.
- Inspect top and bottom under good light.
- Change only one setting at a time.
- Save the final setup in your notes if you sew that fabric again.
If you sew often, keep a small note card or phone note with the needle, stitch length, and foot that worked on each fabric. That record is more useful than memory, especially if you switch between quilting cotton, jersey, and denim in the same month. For a quick refresh on fabric-specific tools, see the fabric and thread guide, the sewing machine maintenance guide, and the needles and feet reference.
On the flip side, don’t build a ritual so rigid that you ignore what the fabric tells you. The machine is not a closed system. The same “good” setting may fail when the fabric thickness changes by even a few layers.
FAQ
Why does my bobbin thread show on the top?
That usually means the upper thread is too loose, not seated correctly, or threaded with the presser foot down. Rethread the machine with the foot up, then test on scrap before changing the bobbin tension. If the problem stays after that, a technician can check the bobbin case and timing.
What stitch length should I start with?
Start with the machine’s middle or default straight-stitch setting, often around 2.5 mm on many domestic machines. Then adjust longer for topstitching or heavier fabric, and shorter for fine detail or gathering.
Do I need to change the needle for every fabric?
No, but you do need the right type and size for the job. A universal needle may handle general cotton, while ballpoint, jeans, or stretch needles work better for knit, denim, and elastic fabric. For exact machine guidance, check the manufacturer’s manual and the needle chart.
Why are my stitches puckering the fabric?
Puckering usually comes from stitch length that is too short, tension that is too tight, or fabric that is being pushed instead of fed. Lengthen the stitch first, then check tension and presser foot pressure.
Should I touch the bobbin tension first?
Usually no. The top tension, needle, threading path, and bobbin wound quality are the faster things to check first. Bobbin tension is best left alone unless you have a clear reason and know the machine’s correct setup. For complex problems, a sewing machine repair shop can verify it.
Drafted with AI; not yet reviewed by a person.