Last updated: November 19, 2026
Key Takeaways
- Compare the sewing pattern to a garment you already wear well, not directly to your body.
- Measure the garment flat, with seams lined up and fabric relaxed.
- Match pattern measurements to the same spots on the garment, then note where it is wider, narrower, shorter, or longer.
- The key measurements vary by garment type, so you do not need every number on the page.
Quick Answer
Use 4 key measurements first: bust, waist, hip, and length. Measure the garment flat, then compare those numbers to the pattern’s finished measurements. A difference of 1/2 inch may not matter, but a 2-inch gap often does.
Your favorite garment tells you what fit you already like, and a sewing pattern should be checked against it before you cut anything. This article on how to compare a sewing pattern to a favorite garment shows you how to compare width, length, and shape to a garment you already love. The steps below use a ruler, a measuring tape, and flat garment measurements.
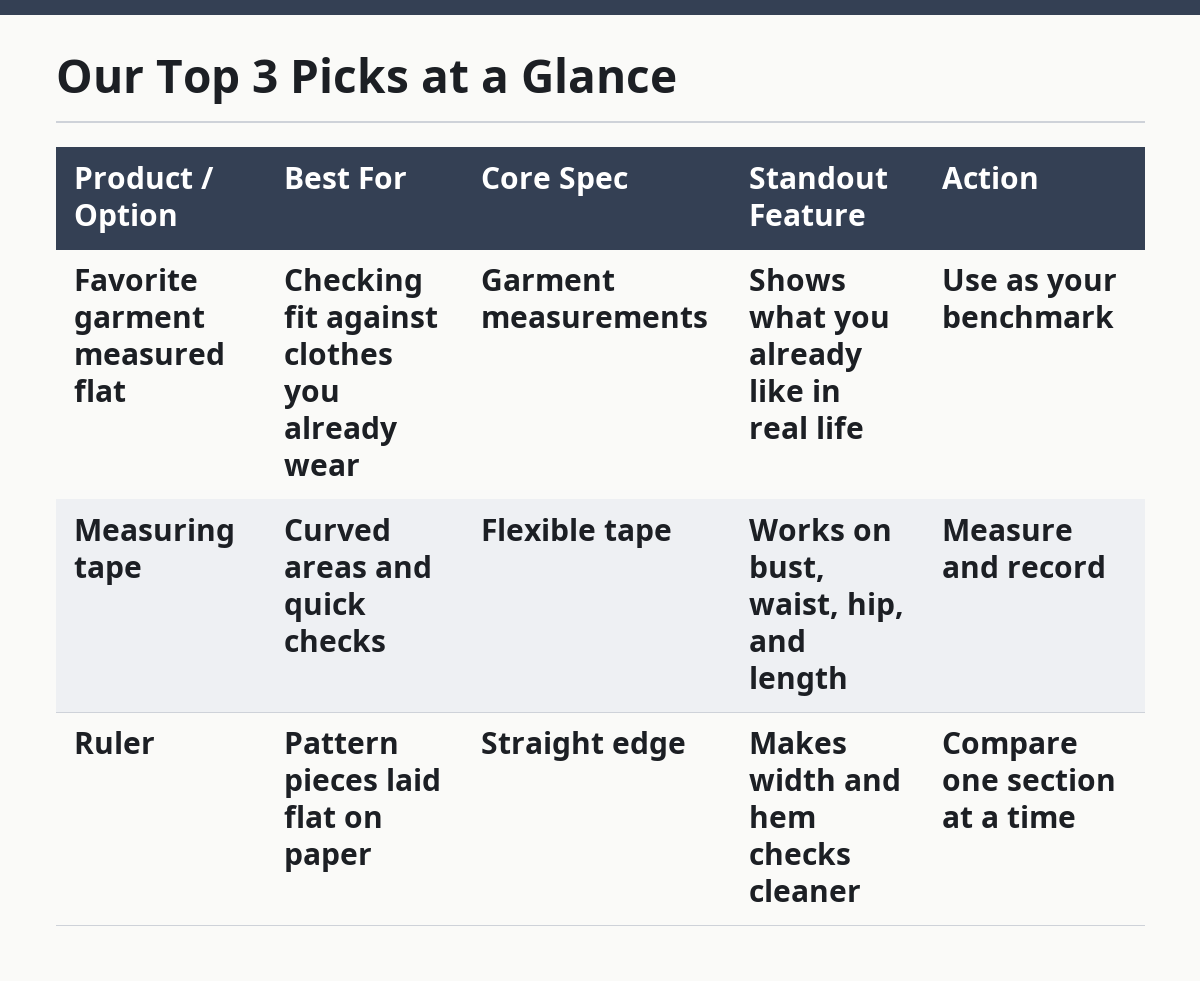
Our Top 3 Picks at a Glance
-
1 Best Overall: Measure the favorite garment flat first, then compare the pattern pieces to those numbers.
-
2 Best Budget Pick: Use a ruler and paper notes only; no special tools are required.
-
3 Best Heavy-Duty / Upgrade Pick: Add a long transparent ruler or seam gauge if you compare patterns often.
| Product / Option | Best For | Core Spec | Standout Feature | Action |
|---|---|---|---|---|
| Favorite garment measured flat | Checking fit against clothes you already wear | Garment measurements | Shows what you already like in real life | Use as your benchmark |
| Measuring tape | Curved areas and quick checks | Flexible tape | Works on bust, waist, hip, and length | Measure and record |
| Ruler | Pattern pieces laid flat on paper | Straight edge | Makes width and hem checks cleaner | Compare one section at a time |
What are you comparing, exactly?
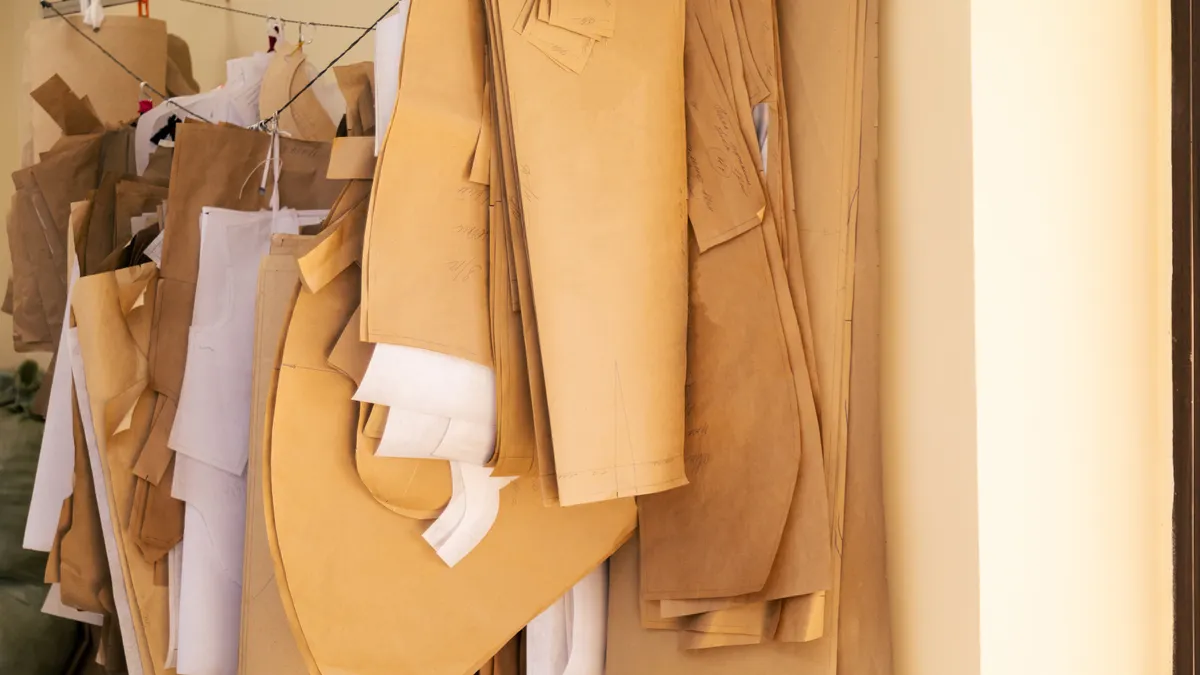
You are comparing the sewing pattern to the shape and size of a garment you already wear well, not to your body. That matters because a favorite shirt, skirt, or dress already includes the style choices you like, such as a closer waist, a longer hem, or a roomier upper arm.
Picture this: you have a pattern in front of you and a shirt you reach for every week. The shirt fits the way you want, but the pattern is still just paper, so the job is to turn that paper into numbers you can trust.
Here’s the catch: you are not trying to make every measurement match exactly. A woven blouse, a knit tee, and a fitted dress need different amounts of room, so the useful target is the shape and feel of the garment, not a perfect copy.
Compare these parts first:
- Bust, chest, waist, and hip width
- Shoulder width and sleeve width, if the garment has sleeves
- Body length, rise, skirt length, or inseam
- Hem width and opening size
- Neckline depth and armhole depth, when relevant
A favorite garment gives you a real-world fit benchmark. It is often more useful than guessing from the envelope art alone.
How do you measure a shirt you already own?
You measure it flat, with the seams lined up and the fabric relaxed. A measuring tape is fine for curves, and a ruler helps on straight edges, especially if the garment is pressed and not stretched out.
Picture this: you spread your shirt on a table and smooth it with your hands until the side seams lie straight. You are not pulling it tight; you are only removing wrinkles and slack so the numbers stay honest.
Follow these steps in order:
- Lay the garment flat on a table and smooth it without stretching it.
- Match the side seams, center front, or center back so the garment sits symmetrically.
- Measure across the garment from seam to seam at the bust, waist, and hip with a ruler or tape.
- Record the full width, then double it if you need the full circumference.
- Measure length from shoulder to hem, waistband to hem, or crotch to hem, depending on the garment.
- Note any special details such as dropped shoulders, curved hems, or elastic waists, because they affect comparison.
A flat measurement is only half the story if the fabric is stretched or very bulky. Rib knits, gathered skirts, and thick sweatshirt fleece can throw off a flat reading, so write down the fabric type with the numbers.
Use a simple note like this:
- Bust width: 20 in flat
- Waist width: 17 in flat
- Hip width: 22 in flat
- Shoulder to hem: 24 in
Now you have a benchmark you can hold next to the pattern.
How do you compare a sewing pattern to a favorite garment?
You compare the pattern piece measurements to the same spots on the garment, then check whether the pattern is wider, narrower, shorter, or longer where it matters. This is the step that tells you whether the sewing pattern can copy the fit you already like.
Picture this: you have the pattern tissue or PDF pieces printed, and you want to know if the finished top will sit like your favorite one. The pattern lines on paper mean nothing until you line them up with the garment numbers you just wrote down.
Use the pattern’s finished garment measurements if the pattern gives them. If it does not, measure the tissue or the printed pieces at the seam line, then compare those numbers to your flat garment measurements.
- Measure the pattern’s bust, waist, and hip widths at the same level you measured on the garment.
- Compare length from shoulder to hem, waistband to hem, or crotch to hem.
- Check shoulder width, sleeve width, and armhole depth if the garment has sleeves.
- Mark the differences in inches or centimeters, not just “close enough.”
- Decide which parts must match and which can stay a little different.
A difference of 1/2 inch in one place may not matter. A 2-inch gap at the bust or hip often does. The point is not exact sameness; the point is to spot where the pattern will change the feel of the garment.
If your favorite garment is looser than the pattern, that does not always mean the pattern is wrong. It may just need a wider size, a different size at the hip, or a style with more ease built in.
Which measurements matter most for tops, bottoms, and dresses?
The most important measurements change with the garment type, and that saves you from chasing every number on the page. A top lives or dies by bust, shoulder, and length; bottoms care most about waist, hip, and rise; dresses need both sets.
Picture this: you are comparing a blouse pattern to a blouse you wear on repeat. You do not need every measurement from the garment, just the ones that control how it hangs and moves when you sit, reach, or bend.
For tops, check:
- Bust width
- Shoulder width
- Body length
- Sleeve width and sleeve length
- Armhole depth
For bottoms, check:
- Waist width
- Hip width
- Rise
- Thigh width
- Inseam or skirt length
For dresses, check:
- Bust, waist, and hip widths
- Bodice length
- Waist placement
- Skirt length
- Neckline depth
The truth is, some fit problems come from the wrong place, not the wrong size. A top can match the bust and still feel off if the shoulder is too narrow or the body is too short. A dress can match the waist and still pull if the bodice is 1 inch too short.
Use the garment type as your filter:
- Top = focus on chest, shoulder, and hem
- Bottom = focus on waist, hip, and rise
- Dress = check both upper body and lower body length
How do you match fit preferences instead of just numbers?
You match the pattern to the way you like clothes to feel, not just to the tape measure. That means you look at where your favorite garment sits close, where it hangs loose, and where it gives you room to move.
Picture this: two shirts have the same bust width, but one feels snug at the upper arm while the other feels easy and relaxed. The numbers may look similar, yet the fit preference is different because the shape is different.
Ask yourself these questions while you compare:
- Do you like a close or relaxed waist?
- Do you want the hem to hit at the same place?
- Do you like a set-in sleeve or a dropped shoulder?
- Do you want room in the hip when you sit?
- Do you mind a deeper neckline, or do you want the pattern higher?
A favorite garment with stretch is not the same benchmark as a woven pattern. Stretch fabric gives, so a knit tee can look smaller on paper and still feel larger on the body. That is why fabric type belongs in your notes.
The comparison is not “Does it match?” but “Does it match the way I wear clothes?” If your favorite dress skims the body and the new pattern is boxy, that difference matters even if the bust number looks close.
What mistakes throw off pattern-to-garment comparison?
The biggest mistakes are stretching the garment, measuring the wrong spot, and forgetting that style changes fit. Those errors can send you toward the wrong pattern size or make a good pattern look wrong on paper.
Picture this: you measure a sweatshirt while it is still bunched at the side seams, then wonder why the numbers are strange. The problem is not the garment. The problem is the setup.
Common mistakes and what they cost:
- Stretching the fabric: makes the garment look larger than it is.
- Measuring curved areas too loosely: gives numbers that are too big.
- Skipping length: leads to hems that land 2 inches too high or too low.
- Ignoring fabric type: makes knit and woven comparisons misleading.
- Comparing style lines only: misses the real fit at bust, waist, and hip.
Do this instead:
- Flatten the garment, but do not tug it.
- Measure at the same points on both the garment and the pattern.
- Write down the fabric type, like cotton jersey or woven poplin.
- Compare width and length together, not one without the other.
A ruler helps on straight seams because your eyes can lie to you. A measuring tape helps on curves because a hard ruler cannot follow an armhole or neckline cleanly. Use both if you have them.
For more on fit checks and sizing logic, the broader hub on measuring, fitting, and sizing for sewing can help without repeating this garment comparison step. The Aldrich approach to pattern work also emphasizes measuring accurately before altering size.
Can I use a favorite dress to choose a pattern size?
Yes, but only if the dress shares the same fit shape and fabric behavior as the pattern you want to make. A favorite dress is a good benchmark for another dress pattern, and it can also help with tops and skirts if the waist, bust, and length lines are similar.
Picture this: you own a dress that fits your shoulders, skims your waist, and lands exactly where you like it. That dress can guide pattern comparison, but only if you measure it flat and compare those same points on the new pattern.
Use the dress this way:
- Measure bust, waist, hip, and bodice length flat
- Check skirt length or hem sweep
- Compare neckline depth and armhole depth
- Note whether the dress is knit, woven, lined, or gathered
A dress is less useful if it has heavy drape, strong shaping, or a lot of stretch that the new pattern does not share. In that case, the numbers can look close while the fit feels very different.
If the dress is your favorite because of the way it hangs, not because of exact measurements, write that down too. “Skims without clinging” is a useful note. “Hits above the knee with easy hips” is even better.
The comparison is not about copying the dress stitch for stitch. It is about finding the pattern that gives you the same wearability, then adjusting from there if needed.
For more on fit checks and sizing logic, the broader hub on measuring, fitting, and sizing for sewing can help without repeating this garment comparison step. The Sew Guide size guidance can also help if you need a second reference point after your garment comparison.
What should I write down before I pick the pattern?
You should write down the garment’s key measurements, the fabric type, and the fit traits you want to keep. That gives you a clean reference when you sort through pattern options later.
Picture this: you have three pattern envelopes on the table and one favorite garment in the chair beside you. The notes decide the winner, because memory gets fuzzy after the second or third option.
Keep a short comparison sheet with:
- Garment name or type
- Fabric type
- Bust, waist, hip, and length measurements
- Notes on ease, sleeve room, and hem placement
- What you want to keep the same
This does not need to be fancy. A notebook page works, and so does a phone note with plain numbers. What matters is that the garment numbers stay beside the pattern numbers instead of living in your head.
The strongest comparison is the one you can repeat later. If you make a blouse this month and a similar one in six months, your notes will save you from starting over.
How do I compare a pattern to clothes I like?
You compare the pattern’s finished measurements to the same spots on the clothes you like. Start with bust, waist, hip, and length, then look at shoulder width, sleeve width, and hem shape if those details matter to you.
A ruler and measuring tape are enough for most garments, as long as you measure the same points on both pieces.
Can I use a favorite dress to choose a pattern size?
Yes, if the dress and pattern have a similar shape and fabric behavior. Measure the dress flat at the bust, waist, hip, and length, then compare those numbers to the pattern’s finished measurements.
A knit dress is a poor match for a stiff woven pattern, even if the measurements seem close. The fabric changes how the garment hangs, so use the dress as a fit guide, not as a perfect template.
Drafted with AI; not yet reviewed by a person.