Last updated: November 19, 2026
Quick answer: test at least 1 scrap before you sew the project. A bad stitch on your project fabric can waste seam ripper time, thread, and a whole cut of cloth. How to Test a Sewing Machine Stitch on Scrap Fabric starts with a scrap that matches the real fabric before you sew the project. The steps below will show you what to sew, what to inspect, and how to compare the result before you touch the good piece.
Key Takeaways
- Use a scrap that matches the project fabric in weight, stretch, and weave.
- Change only one thing at a time, such as stitch length or thread, so the result means something.
- A test stitch should lie flat, lock in the fabric, and look even on top and bottom.
- If the scrap behaves badly, the scrap is telling you more than the machine is.
- Save one labeled test sample for the project file or pattern envelope.
How do you test stitches before sewing?
You test stitches before sewing by running a short sample on scrap fabric, then checking the top, the underside, and the seam line for evenness. Start with the same fabric layers, same needle, and same thread you plan to use on the project. According to Singer, a test seam helps you confirm tension and stitch appearance before you sew the final piece.
A test stitch sample lets you see the result before the real fabric is on the line. It also gives you a quick way to compare settings after each change.
Use a scrap that is at least 6 to 8 inches long if you can. If the project uses two layers, stack two scraps the same way. If it uses interfacing or a facing, include that too. A matching sample gives the clearest read.
- Choose scrap fabric that matches the project fabric and cut a piece large enough for a short seam.
- Insert the needle you plan to use for the project, such as a universal, ballpoint, or denim needle.
- Thread the machine with the same thread type and color you will use on the project.
- Set the stitch length to the starting number you want to try, then sew a straight line on the scrap.
- Inspect the sample on both sides and compare the stitches to the fabric.
On the first pass, keep the stitch length simple. A straight stitch often starts around a medium setting, while topstitching or heavy cloth may need a longer stitch. The exact number depends on the fabric, but the point is the same: make the machine sew a short, honest sample before you commit. Consumer Reports notes that stitch quality can vary by fabric and machine setup, so a quick sample helps before the final seam.
Which scrap fabric should you use?
You should use a scrap that matches the project fabric as closely as possible, not just any leftover cloth from the drawer. A cotton scrap will not tell you much about silk, denim, or stretch jersey, because each one feeds through the machine differently. The best match is usually the same fabric family, such as woven with woven or knit with knit.
A How to Test a Sewing Machine Stitch on Scrap Fabric sample works best when the scrap behaves like the real project. The seam may still fail if the cloth is too different.
Use these rules for choosing scraps:
- Match the fiber type when you can: woven with woven, knit with knit.
- Match the layer count: one layer for a single layer seam, two layers for a seam.
- Match the interfacing if the project uses any.
- Match the finish if possible: prewashed cotton behaves differently from stiff, unwashed cloth.
- Keep the scrap big enough to sew at least a few inches in a straight line.
A cut-off from the same yardage, such as the end trimmed from a skirt panel or sleeve, is often the most useful scrap. If that is not possible, pick a piece that behaves the same in your hand. A light woven, a medium quilting cotton, and a thick canvas will not give the same stitch test.
Do not use frayed scraps, old muslin with stretched edges, or a bias-cut piece if the project fabric is not bias-cut. Those scraps distort the line and hide the real result. Wrong scrap, wrong answer.
What should you check on the test stitch sample?
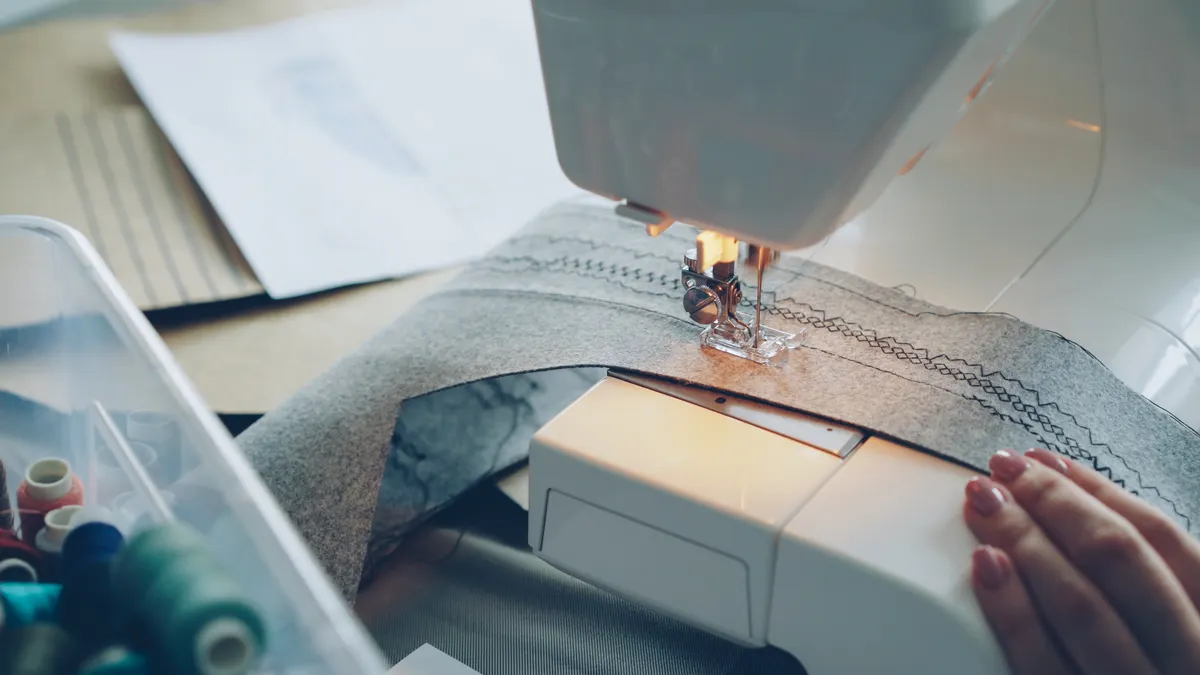
You should check stitch balance, stitch length, seam flatness, and whether the fabric puckers or tunnels. A good sample usually looks even on top and bottom, with no looping, tight pulls, or broken thread at the line.
A stitch sample also shows whether the machine is pulling the fabric evenly. If the cloth drags, waves, or shifts sideways, the seam may need a different needle, foot, or stitch choice later.
Look for these signs:
- Even stitch spacing along the whole line.
- Flat fabric with no ripples beside the seam.
- Clean start and stop points, with no knot pile at the ends.
- No skipped-looking gaps in the line.
- No thread nests under the fabric.
If the stitches look too short, the seam can feel stiff or crowded. If they look too long, the seam can open or look weak on fine cloth. A practical test line is usually only 3 to 4 inches long, but you can sew another line right next to it with a different stitch length for comparison.
The sample also tells you how the feed dogs are handling the fabric. This page sits inside the larger machine sewing setup and stitch control guide, so the test sample here is the part that proves your setup before you sew the real piece. See also the machine sewing setup and the stitch control guide.
How do you compare one stitch length to another?
You compare stitch lengths by sewing separate lines on the same scrap and labeling them before you forget which is which. That gives you a side-by-side read on which setting fits the fabric, the seam, and the look you want.
You can compare the lines on one scrap, then label each line right away. The note can be as simple as “2.5” or “3.5.”
A simple comparison method:
- Mark the scrap into two or three zones.
- Sew the first line with one stitch length.
- Change one setting only and sew the next line.
- Compare the lines for density, drape, and strength.
- Choose the line that suits the fabric best.
Use the same needle, same thread, and same presser foot for every line in that comparison. If you change thread and stitch length at the same time, you no longer know what caused the difference. That is the biggest mistake in stitch testing. It wastes more time than it saves.
For a topstitched edge, a longer stitch often looks cleaner. For a seam that needs more hold on a light woven, a medium stitch may suit better. For bulky cloth, a too-short stitch can bunch the seam and make it hard to press. Keep the comparison on one scrap whenever possible, because different scraps can hide the difference. See the topstitching basics if you want to compare finish as well as hold.
What needle and thread checks belong in the test?
You should check the needle and thread in the same sample because a stitch can fail from a mismatch, not just from the setting. A fresh needle and the right thread often change the stitch more than a small adjustment does.
A dull needle can leave a rough line even when the stitch length is correct. A thick thread can also change how the line lies on the fabric. If you switch from all-purpose thread to heavier topstitch thread, make a new test sample.
Before you sew the sample, confirm:
- The needle type fits the fabric, such as universal for many woven fabrics or ballpoint for knits.
- The needle size matches the material thickness.
- The thread fits the needle eye and the fabric weight.
- The thread path is threaded cleanly through the machine.
- The needle is seated all the way up.
A bent, dull, or wrong-type needle can create a stitch that looks uneven even when the machine setting is fine. Thick thread can also change how the line lies on the fabric. If you switch from all-purpose thread to heavier topstitch thread, make a new test sample. Do not trust the old one. See the sewing machine needle guide for common sizes and uses.
This is also where a reader often goes wrong by making too many changes at once. A new needle, new thread, and new stitch length can all be part of the fix, but only one change at a time will tell you what actually helped. That is the point of the scrap. If the stitch still looks off, check your machine tension guide before you sew the project.
When should you stop and retest?
You should stop and retest anytime the sample changes in a way you did not expect. A stitch that looked fine on the first scrap can shift once you add a second layer, a seam finish, or a different feed speed.
If the first sample looks good, do not assume the whole project will match it. Bulky spots can behave differently.
Retest when:
- You change from one layer to two layers.
- You add interfacing, batting, or a seam allowance fold.
- You change thread type or needle size.
- You switch from a straight seam to a topstitch.
- You move from a flat scrap to a curved or bulky area.
If the fabric changes even a little, make a new sample. That includes a cuff, collar, hem, or pocket area with extra layers. The sample that matches the thickest, trickiest part of the project is the one you want.
On a tricky seam, keep the old sample beside the new one. A side-by-side compare shows what changed faster than memory does. It is a simple habit, and if needed, consult a sewing professional before you alter the project. The seam finishing guide can also help you decide whether the edge needs a different finish.
Keep a test sample for the project
You should keep the test sample because it gives you a record of the thread, needle, and stitch length that worked. A pinned sample can save time if you need to return to the machine later or sew a matching second piece.
A labeled sample removes the guesswork. You can look at the scrap and see the exact stitch that passed your check.
Write the stitch length, needle type, and thread on a small tag or directly on masking tape attached to the scrap. If you use more than one setting, keep both pieces. A simple paper note with stitch length and fabric type is enough.
This habit matters most on projects that repeat, such as garments, bags, and home sewing jobs with more than one seam. The sample becomes your reference point. If the next seam starts looking different, compare it to the saved scrap before changing three things at once.
A saved test sample also helps if you need to match stitches on a repair later. You can hold the scrap next to the garment and aim for the same look. See the sewing repair guide if you need to match an existing seam.
How do I test stitches before sewing?
You test stitches before sewing by sewing a short line on scrap fabric that matches the project fabric, then checking the top, bottom, and seam shape. Use the same needle, thread, and stitch length you plan to sew with first. If the sample looks wrong, change only one thing and sew again.
What should a test stitch look like?
A good test stitch looks even, lies flat, and holds the fabric without puckering it. The top and underside should both show clean lines, with no big loops, loose threads, or tight gathers beside the seam. The fabric should still drape the way you expect after sewing.
Do I need to test stitch on the same fabric?
Yes, you should test on the same fabric or on a scrap that behaves the same. A different cloth can hide problems because it feeds, stretches, and presses differently. If the project uses two layers or interfacing, include those in the scrap test too.
Drafted with AI; not yet reviewed by a person.