Last updated: November 19, 2026
Sewing patterns rarely fit off the page, and that’s normal. The fix is to match the pattern to your body before you cut, then alter the garment in muslin or on tissue where the changes stay controlled. Sewing pattern alteration and fit — The Complete Guide starts with a quick answer: for many garments, one to three measured changes are enough to move from “close” to “wearable.” The steps below show which measurements matter, which fixes are safe, and which changes are a bad bet.
A good fit starts with the right measurements, the right pattern size, and a clear order of alterations. Get those three right and most fitting problems become boring instead of maddening. In practical terms, that often means one size for the shoulders, another for the waist, and a third for the hips.
Key Takeaways
- Fit problems usually start before the first cut, not after the garment is half sewn.
- Bust, waist, hip, rise, and shoulder width matter more than the size number on the envelope.
- Simple length adjustments, full bust adjustments, and small width changes at seam lines are often a practical place to start, though the best choice still depends on the pattern and fabric.
- Major shape changes get messy fast when you ignore grain, dart placement, or sleeve cap balance.
- A muslin or a tissue fitting saves fabric, especially on patterns with princess seams, trousers, or jackets.
- Some garments are not worth altering deeply; the pattern shape may be wrong for your body from the start.
- In many home-sewing projects, a 1 to 2 inch change is routine, but a bigger change can affect the whole draft.
What actually changes the fit of a sewing pattern?
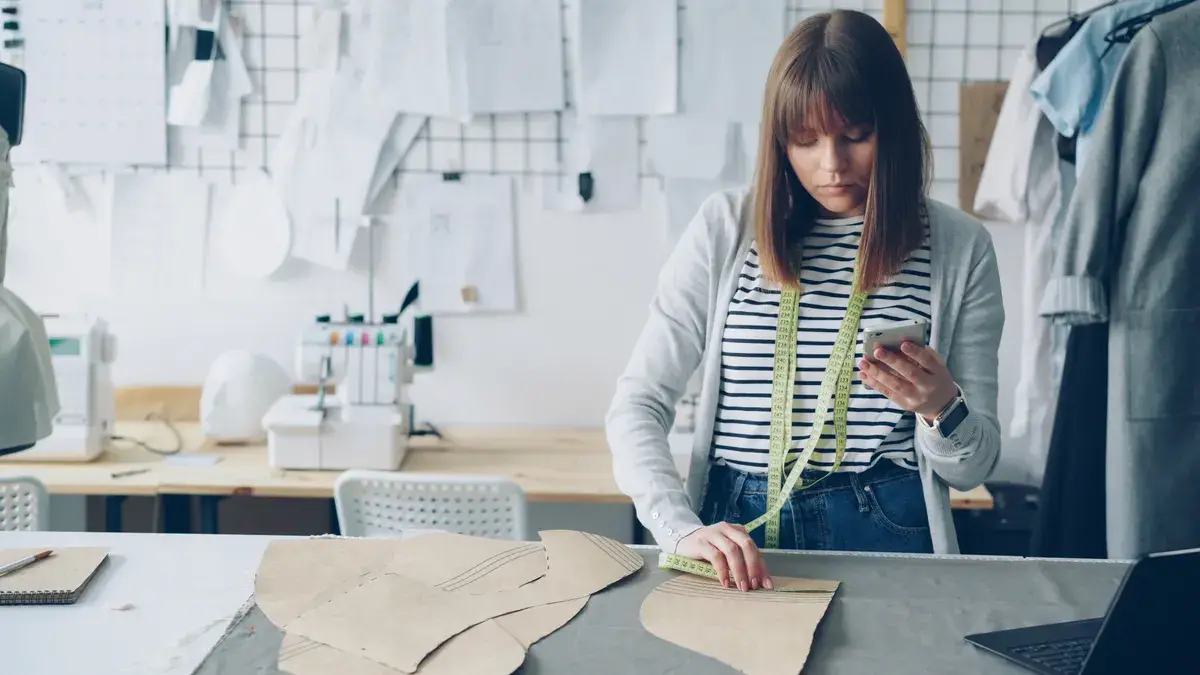
Fit changes because your body and the pattern draft are rarely the same shape. A pattern size is a starting point, not a promise, and the real job is to move fabric where your body needs room and remove it where it pools. In sewing pattern alteration and fit work, that mismatch is the whole story.
Picture this: you have the right size at the waist but the bodice gapes at the bust, the pants pull across the thighs, and the sleeves twist after ten minutes of wear. That is not one problem. It is usually three separate fit issues.
The pattern language matters here:
- Wearer ease is the room you need to move and breathe.
- Design ease is the extra room the style wants.
- Fit ease is the small amount of space that keeps the garment from clinging like shrink wrap.
If a garment feels wrong, one of these is usually off:
- The pattern was chosen by bust size alone.
- The length was ignored.
- The body shape and pattern shape do not match.
- Seam allowances were treated like fit insurance, so it is safer to confirm the fit in a muslin or with a fitting check rather than rely on seam allowance alone. The United States Pattern Committee and the American Sewing Guild both emphasize that seam allowance is for construction, not a guarantee of fit.
- The first fitting happened after all the fabric was cut.
Here’s the catch: you can only fix some things with a seam ripper. A 2-inch hem change is simple. A twisted sleeve, a dragged crotch, or a too-narrow back is a drafting problem, not a pressing problem.
For measurement context, ASTM and ISO apparel fitting methods both treat body dimensions as the starting point, not the finish line. That is why sewing pattern alteration and fit decisions usually begin with measurement, then move to shape.
How do you choose the right size before altering anything?
Choose size from your body measurements, not the envelope photo, and expect to blend between sizes. Most people need more than one size on the same pattern, especially in commercial patterns that draft for a standard proportion, not a real person.
Picture this: your bust measurement says one size, your waist says another, and your hips land somewhere else. That mismatch is normal, and blending sizes is usually the cleanest first move before you change darts, seams, or hems. It also keeps sewing pattern alteration and fit work more predictable.
Use these measurements first:
- High bust
- Full bust
- Waist
- Full hip
- Back waist length
- Shoulder width
- Rise for pants
- Inseam for pants
The high bust measurement matters because many women’s patterns are drafted to fit a B cup; if your full bust is larger, the pattern may hang from the shoulders and still pull across the chest. That is why a full bust adjustment often beats simply choosing a bigger size.
Two rules save a lot of grief:
- Fit the shoulders and upper chest first.
- Fit the widest lower body point second.
If the shoulders are too wide, the whole garment can sag. If the hips are too tight, side seams swing forward and skirts ride up. If the waist is wrong but the shoulders and hips are good, the waist is the easy part.
A useful habit: trace the pattern before cutting. That lets you:
- blend sizes cleanly,
- preserve the original tissue,
- compare pieces side by side,
- and mark changes without wrecking the master pattern.
According to the American Sewing Guild, tracing also makes it easier to keep a reusable master copy, and that matters when you are testing several fit adjustments on the same base pattern.
Which alterations should you learn first?
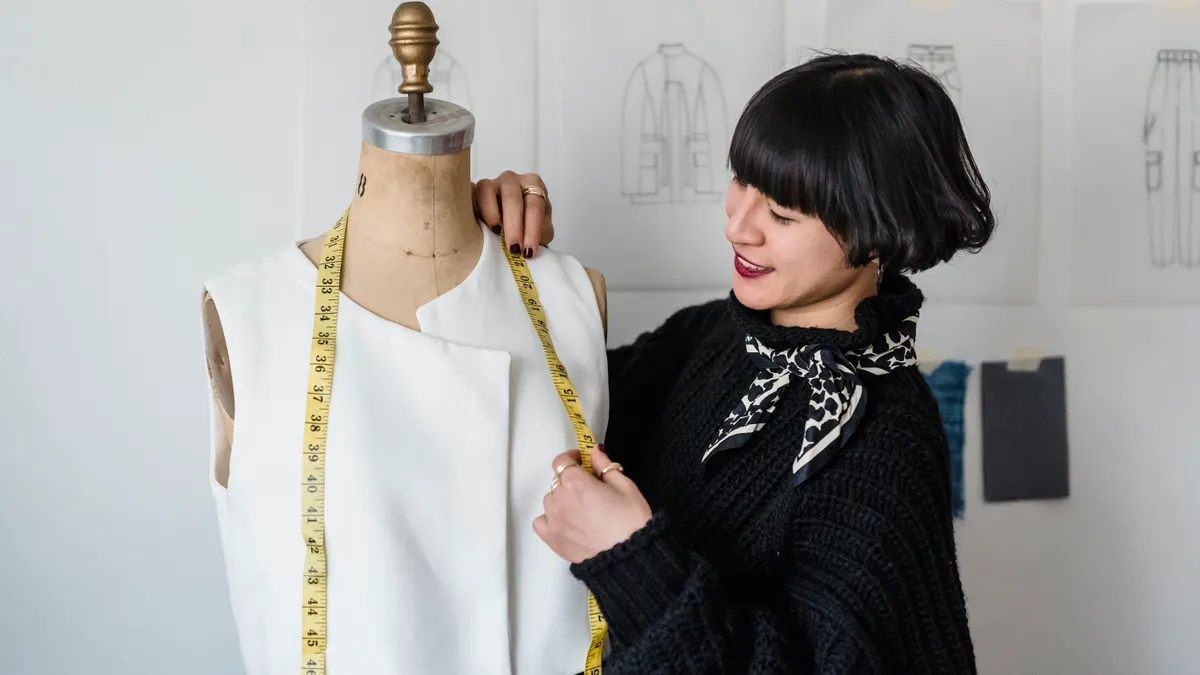
Start with length, then bust, then width, because those are often the most manageable changes for a beginner, though the best order still depends on the pattern and fabric. That order works for most beginners and still holds for experienced sewists when a pattern behaves badly.
Picture this: you’ve pinned a muslin and the hem sits too high, the waistline rides above your natural waist, or the sleeves end at the knuckles. Those are the easiest problems to solve because they change vertical placement, not the whole garment shape.
The first alterations worth mastering are:
- Shorten or lengthen at a marked line
- Lengthen or shorten a bodice above or below the bust
- Full bust adjustment
- Broad back adjustment
- Swayback adjustment
- Hip blend between sizes
- Taper pants at side seams or inseams
- Adjust hem width if the leg or sleeve opening hangs wrong
A few alterations are not equal. Shortening a sleeve by 1 inch is routine. Moving a bust dart without checking the apex can wreck the drape. Adding width to the side seam of a shirt can work, but adding too much can change the armhole and sleeve fit.
This is the rule I trust: alter at the place where the problem appears. If the jacket pulls at the upper back, don’t fix it only at the side seam. If the trouser drag line starts at the crotch, don’t blame the hem.
The University of Nebraska–Lincoln Extension notes that simple changes are best handled early, before more complex fitting work. That lines up with practical sewing pattern alteration and fit practice, where the first correction should be the smallest one that addresses the visible problem.
How do you read the fitting clues on a muslin?
Read the wrinkles, not just the tight spots, because the cloth points back to the strain line. A muslin shows where fabric is being pulled, where it is hanging loose, and where the pattern shape is fighting your body.
Picture this: you stand in front of a mirror in a test garment and see diagonal wrinkles, a pulled neckline, or folds that look random. They are not random. They map to missing length, missing width, or a balance issue.
Common clues:
- Horizontal pulls usually mean not enough width or length in that area.
- Vertical folds often mean excess width.
- Diagonal drag lines often mean the garment is too small or the balance is off.
- Gaping neckline can point to a narrow shoulder, too much length above the bust, or a poor dart angle.
- Armhole wrinkles may come from shoulder slope or biceps width.
- Pants wrinkles at the crotch often point to rise and crotch curve problems.
A muslin is not about looking pretty. It is a diagnostic garment. Leave in the seam allowances, mark the grainline, the bust point, the waistline, and the hipline, then pin or baste in the minimum changes. That gives you a map. For sewing pattern alteration and fit, the map matters more than the appearance.
One practical move helps a lot: take photos from front, side, and back. The eye misses things in the mirror. A side photo can show whether the shoulder seam is forward, whether the bust point is too high, or whether the back waist is swimming in cloth.
For deeper reading on body measurement and pattern fitting standards, the University of Nebraska–Lincoln Extension and the American Sewing Guild both have sewing education material that can help frame the process, even if they do not give you a one-step fix for every body.
What is the real difference between pattern alterations and full pattern drafting changes?
Alterations fine-tune an existing shape; drafting changes rebuild the shape. If the pattern is close, alter it. If the pattern is fighting your body in several places at once, start over with a different block or a different pattern family.
Picture this: you like the style line, but the armhole is too low, the torso is too long, the bust is short, and the waist sits in the wrong place. At that point, you are not making a couple of edits. You are asking the draft to become a different pattern.
Here’s the difference in practice:
- Alteration: move the side seam, add a little length, shift a dart, blend a size.
- Drafting change: redraw the armhole, reshape the crotch curve, change the sleeve cap, or rebuild the torso block.
That matters because some changes create knock-on effects. A larger bust adjustment changes dart intake. A bigger bicep change can require a bigger sleeve cap. A major hip adjustment may alter hem sweep and pocket placement.
Use alterations when:
- The garment fits at least one anchor area.
- The style line still suits you.
- The change can stay local.
- The fabric is not too expensive to risk.
Use drafting-level changes when:
- The same fitting problem appears in every pattern from that company.
- The shoulder slope, torso length, or crotch curve is consistently wrong.
- The garment is tailored and the fit must be precise.
- The alteration list has become longer than the construction instructions.
The truth is, not every pattern is worth saving. A bad draft can burn hours. Sometimes the smartest move is a different pattern line with a better block for your shape.
According to the Clothing and Textile Research Journal, fit is not just about dimensions; it is also about balance and proportion, which is why a pattern can be “close” and still be wrong in movement.
How do you alter shirts, dresses, and pants differently?
Shirts and dresses usually need bust, shoulder, and waist work; pants usually need rise, crotch, and thigh work. The body areas are different, so the order of fitting changes too.
Picture this: a dress fits the shoulders but rides up when you sit, or trousers fit the waist and sag at the seat. Those are not the same problem, and using the same fix on both is how many people end up with worse fit than they started with.
For tops and dresses:
- Fit the shoulder seam first.
- Check bust placement and dart position.
- Adjust length between bust and waist if the bodice rides up or sags.
- Check the back neck and upper back for gaping or drag lines.
- Then set the waist and hip.
For pants:
- Fit the crotch depth and rise first.
- Check the seat and the front crotch curve.
- Then assess thigh width and knee ease.
- Finish with hem width and inseam length.
A few garment-specific notes matter:
- A princess seam can be easier to fit than a darted bodice because the shaping is spread through the seam.
- A jacket with lapels has more structure, so shoulder and sleeve fit matter more.
- Knit patterns forgive more in the waist and hip, but less in neck and shoulder balance if the fabric is unstable.
If you make only one pants fitting test, sit down in it. Standing fit can lie. The crotch may look fine until the seat pulls hard the moment you bend.
That is why sewing pattern alteration and fit for pants often needs a sit test, while tops benefit from arm movement and shoulder checks. The garment has to work in motion, not just in a mirror.
What changes are safe to make on tissue paper, and what needs a muslin?
Tissue fitting is fine for simple size and length changes, but anything with curve, balance, or posture needs fabric on the body. Paper can show placement; cloth shows behavior.
Picture this: you have a blouse pattern with a clear hem line and a clean dart, and you only need to shorten the body by 1.5 inches. Tissue fitting is ideal there. But if the same blouse has a princess seam, a curved neckline, and a sleeve cap, paper alone will not tell you how it hangs.
Use tissue fitting for:
- sleeve and hem length,
- simple waist and hip blends,
- basic shoulder width changes,
- dart movement on flat pieces,
- checking balance lines.
Use muslin for:
- bust adjustments,
- trousers,
- jackets,
- curved armholes,
- anything with multiple seam intersections,
- fabrics that behave differently under tension.
Why the split? Tissue lies flat. Bodies do not. Once a pattern wraps around a bust, pelvis, or shoulder blade, the fit starts to depend on three-dimensional shape, not just measurements on a page.
A useful compromise is a partial muslin. Sew the area that matters most, such as the bodice and one sleeve, or the upper trouser section. That saves time and still gives real fit information. In sewing pattern alteration and fit work, this can be the quickest way to test one problem without sewing the entire garment.
The Honest Side-by-Side
Pattern alteration wins for most home sewers; full drafting changes win when the same pattern keeps failing in the same place. The right choice depends on how far your body shape sits from the original block.
Picture this: you have two paths. One is a careful set of measured edits that keeps the original design. The other is a bigger rebuild that fixes the draft itself. Both can work, but they serve different problems.
| Criteria | Pattern Alteration | Full Drafting Change | Winner for |
|---|---|---|---|
| Time to get started | Faster; you can trace and mark changes right away | Slower; you may need to redraw major pieces | Beginner with a close-fit pattern |
| Risk of ruining the original | Lower if you work on a copy | Higher because more lines move at once | Someone cautious with expensive fabric |
| Best use | Small to moderate fit issues | Repeated fit failures or major body-shape mismatch | Experienced sewist with the same problem across patterns |
| Shoulder fit | Can be adjusted, but only within limits | Better when shoulder slope or width is far off | Narrow or broad shoulders with recurring issues |
| Bust fit | Works well for a full bust adjustment | Better when bust shape and torso length both need change | Curvy bust and long torso together |
| Pants fit | Good for waist, hip, thigh, and length tweaks | Better for severe crotch or seat mismatch | Pants that are close but not right |
| Sleeve fit | Good for shortening, widening, or small cap changes | Better when the armhole is the wrong shape | Sleeves that almost fit |
| Fabric waste | Usually lower | Usually higher until the draft is stable | Someone conserving yardage |
| Learning curve | Steeper only if the change is complex | Steepest because it combines fitting and drafting | Advanced pattern worker |
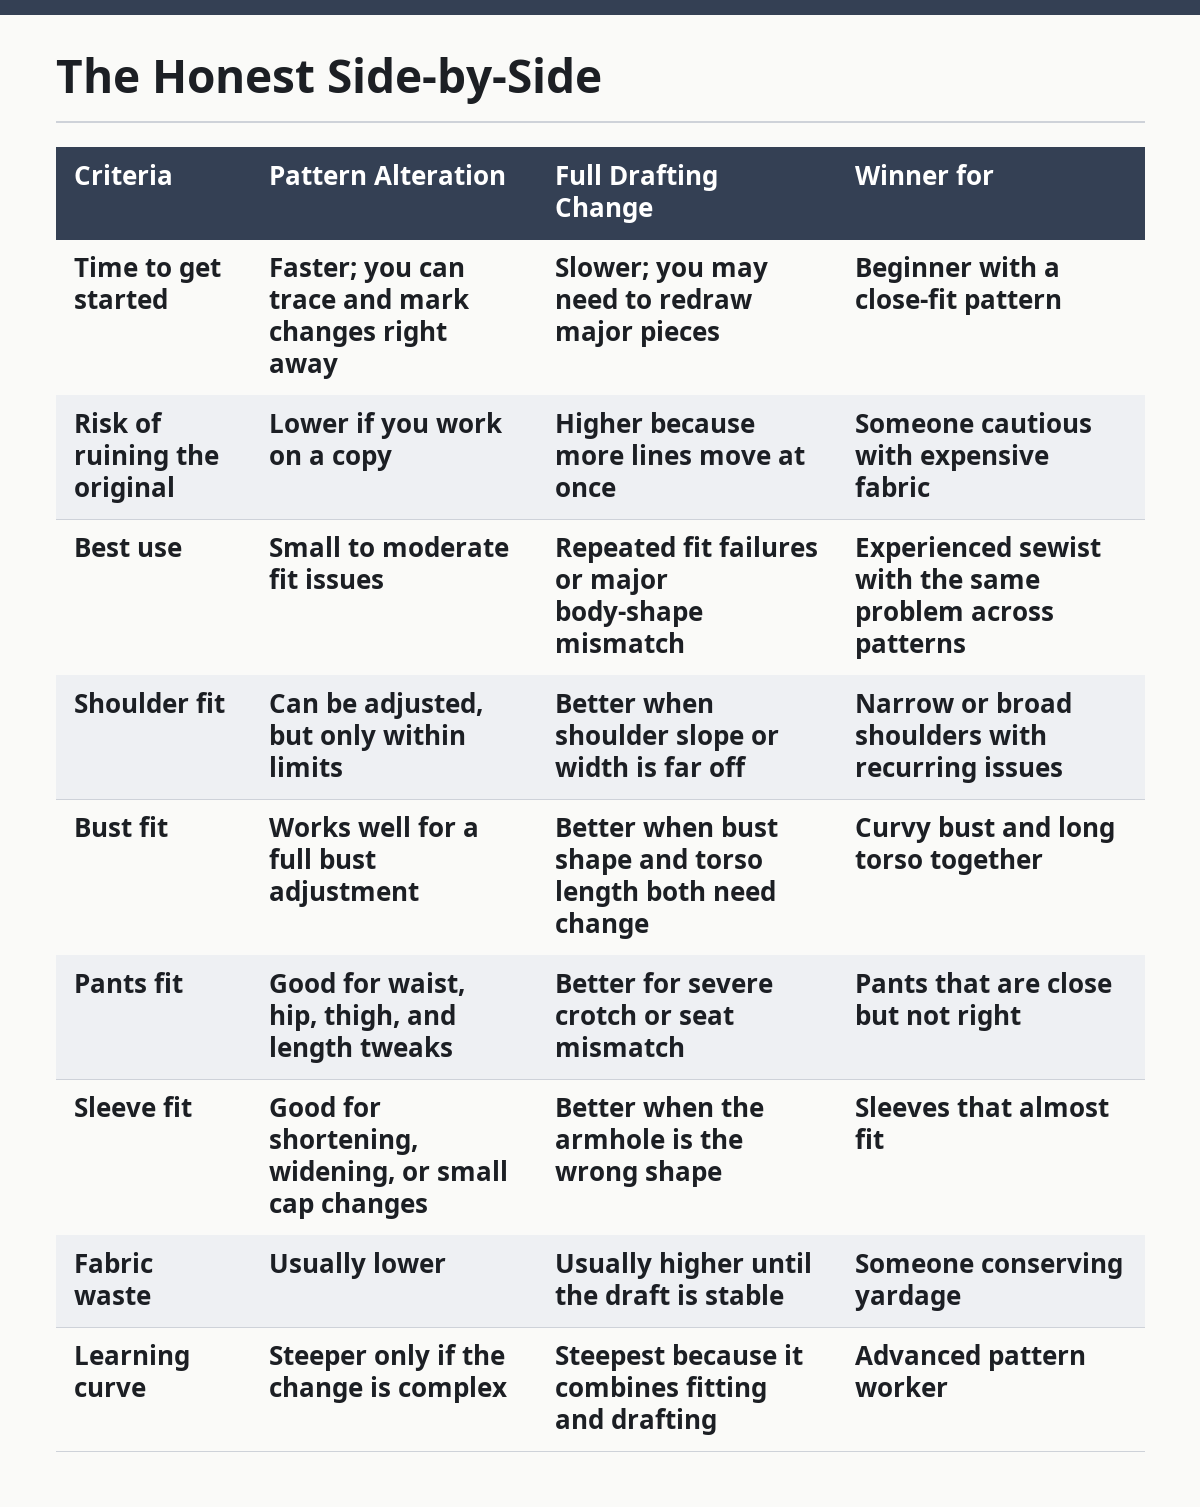
The table says the quiet part out loud: alteration is the default, not the fallback. Drafting is what you do when the alteration list grows teeth.
The verdict: which one should you choose and why?
Choose pattern alteration if the garment is close, the problem is local, and you want to keep the original design lines. Choose full drafting changes if the same body issue shows up in every version of the pattern and the fixes keep colliding. Neither if the base pattern is so wrong that the shoulder, bust, waist, and hip all fail at once.
Picture this: you are standing in a half-fitted garment with pins everywhere. The question is not “Can I make this work somehow?” The question is whether the pattern is still worth rescuing with targeted changes or whether it needs a new block.
Pick pattern alteration when:
- the shoulders fit within reason,
- the bust issue is clear and isolated,
- the waist or hem is off by a manageable amount,
- and the style still looks right after one or two changes.
Pick drafting changes when:
- you always need the same major fix,
- the armhole or crotch is wrong in every pattern,
- or the garment collapses in several places at once.
Do not keep patching a bad draft just because you already spent time on it. That is how a simple blouse becomes a six-hour argument.
If you are weighing sewing pattern alteration and fit against a full redraw, ask whether you are correcting one area or rebuilding the whole shape. That distinction usually makes the answer obvious.
What are the most common fitting mistakes people keep making?
The most common mistake is changing the wrong place first. After that comes choosing size by finished garment measurements alone, which sounds sensible and still creates awful fit if the pattern draft is off.
Picture this: you feel a pull across the bust and immediately widen the side seams. Now the armhole drops, the shoulder shifts, and the neckline gapes worse than before. The first fix was aimed at the symptom, not the source.
Other repeat offenders:
- Using a bigger size instead of blending sizes.
- Skipping the muslin because the fabric is “only cotton.”
- Forgetting that posture changes fit.
- Ignoring seam balance after altering one side only.
- Pressing a wrinkle flat and calling it fit.
- Making the same change on front and back without checking each piece separately.
One more trap: not every wrinkle is an alteration clue. Some are from fabric, not pattern. A crisp twill, a slippery rayon, and a stable poplin will drape differently even in the same size.
For sewing pattern alteration and fit, that means a 2-inch change in one fabric may behave differently in another fabric weight or weave. The fit problem is the same; the result is not.
When should you stop altering and choose a different pattern?
Stop altering when the pattern shape is fighting your body more than the style is serving you. If the fix list keeps growing past three major areas, the pattern is usually the problem, not your skills.
Picture this: the bodice needs a full bust adjustment, the shoulder needs narrowing, the waist needs shortening, and the armhole still caves in. At that point, you are doing rescue work on a draft that may never sit cleanly.
Switch patterns when:
- The shoulder, bust, and waist all need major changes.
- The crotch, seat, and thigh all miss the mark.
- The style line gets destroyed by the changes.
- The fitting process is no longer teaching you anything useful.
That is not failure. It is pattern selection. A better starting block can save more time than any clever fix.
For authoritative fitting references, the Sewing and Craft Alliance and the Clothing and Textile Research Journal are useful places to look for construction and fit terminology if you want to read beyond a beginner guide. The National Institute of Standards and Technology also publishes body measurement and sizing research that helps explain why no single size fits every body.
FAQ
Why does my sewing pattern fit at the bust but not at the shoulders?
Because bust size and shoulder width are separate fit issues. A pattern can match your bust and still be too wide or too narrow across the shoulder line. Check the shoulder seam placement first, then decide whether you need a shoulder adjustment, a full bust adjustment, or both.
Do I need a muslin for every pattern?
No, but you do need one for any pattern with a high-risk fit area. Trousers, jackets, close-fitting dresses, and anything with princess seams usually deserve a test garment. A simple boxy top or loose robe may only need tissue fitting and a quick check of length.
What’s the safest first alteration to learn?
A hem-length check is often the easiest first alteration to practice, but it is not universally the safest because the right first change depends on the pattern and fabric. Shortening or lengthening at the marked line usually changes the least about the garment’s shape. After that, learn basic size blending and then a bust adjustment if you sew fitted tops or dresses.
Why do my pants twist after I alter the waist?
Because the waist is not the whole pants fit. Twisting often points to a rise, crotch curve, or thigh issue, not just the waistband. If you only take in the waist, the pants can still hang badly through the seat and leg.
Can I fix a bad fit after the garment is sewn?
Sometimes, but only if the problem is small and the seams are still accessible. You can often tweak side seams, hems, waistbands, or sleeve length after sewing. Major changes like armhole shape, crotch curve, or bust position are much harder once the garment is assembled.
Drafted with AI; not yet reviewed by a person.