Last updated: November 18, 2026
Quick Answer: In most cases, sewing machine setup and troubleshooting starts with four checks—needle, threading, bobbin, and fabric match—and about 10 cm of test stitching on scrap.
Key Takeaways
- Reset the basics in order: needle, bobbin, upper threading, tension, then stitch settings.
- Build a known-good baseline before sewing your first seam.
- Under-fabric loops usually point to threading, bobbin direction, or tension balance.
- Match needle, stitch length, and foot pressure to the fabric before blaming tension.
Your sewing machine is usually not “broken” when the stitch goes wrong. It is more often misthreaded, set for the wrong needle, using the wrong tension, or pushed through fabric the machine was never meant to handle. In sewing machine setup and troubleshooting, the fastest path to clean stitches is usually to start with setup: needle, bobbin, threading, presser foot, and fabric choice.
What actually fixes most sewing machine problems?
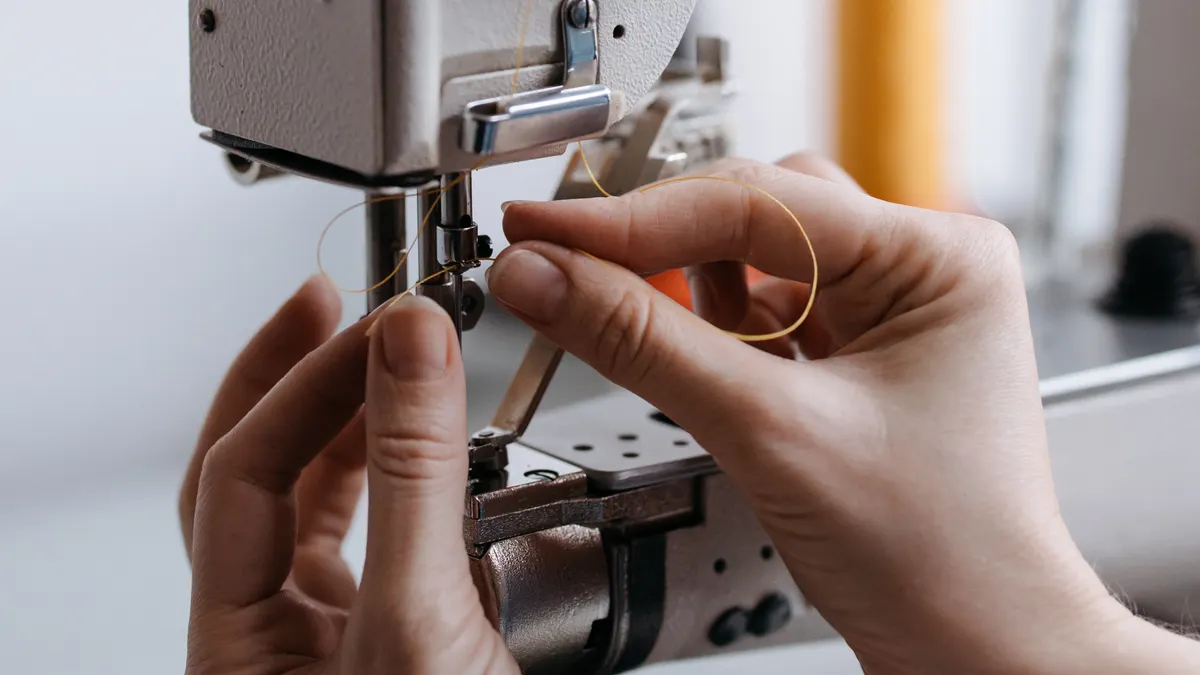
The fastest fix is often to reset the basics in a strict order: needle first, then bobbin, then upper threading, then tension, then stitch settings. If the stitch is messy, start there before touching anything else. Most trouble comes from one of those four points, not from the motor, the timing, or some mysterious internal fault.
That sequence matters because the symptoms overlap. Loose loops on the underside can come from a top-thread threading error, a bobbin inserted backward, or tension set too low. Skipped stitches can come from a bent needle, the wrong needle system, or a foot that is not seated properly. Puckering can come from too much tension, a needle that is too large for fine fabric, or a stitch length that is too short.
If you want a practical rule, use this one: change one thing at a time and retest on scrap fabric about 10 to 15 cm long. Do not “fix” five settings at once. If the stitch improves, keep that change and move to the next likely cause. If it gets worse, back out and try the next branch.
The setup order below is the one that saves the most time:
- Turn the handwheel toward you and raise the needle to its highest point.
- Replace the needle with a fresh one of the right size and type.
- Re-seat the bobbin and confirm the thread pulls in the correct direction.
- Re-thread the top thread with the presser foot up.
- Set stitch length, stitch width, and tension to a neutral baseline.
- Test on the same fabric layers you plan to sew, not on a single scrap if the project uses two or three layers.
A generic article often says “check tension” first. That is backward. Tension should be the last simple adjustment, not the first guess. Needle problems and threading errors are more common, cheaper to fix, and easier to confirm.
Quick check: if the machine suddenly started sewing badly after a needle change, rethread first; if the issue appeared after a fabric swap, look at needle size and stitch settings first.
How do you set up a sewing machine from scratch?
You set it up by building a known-good baseline before you sew a single seam. If the machine is new, stored for months, or borrowed from someone else, treat it like a reset job and, if you are unsure about maintenance or safety, consult a professional and the manual: clean, oil only if the manual says so, install the correct needle, thread it properly, and test on woven cotton before moving to stretchy or slippery fabric. In manufacturer guidance from both Singer and Brother, the presser foot-up threading and correct needle installation are basic setup steps, and Singer’s machine manuals commonly specify stitch lengths around 2.5 mm for standard seams.
Here is the clean setup path that avoids most beginner failures:
- Unplug the machine and remove the presser foot, needle plate cover if your model allows it, and bobbin case if it is removable.
- Brush out lint with a small nylon brush, especially around the feed dogs and bobbin area. A flashlight helps more than guessing.
- Check the manual for your exact needle system. Many home machines use 130/705 H, but do not assume; a wrong system can seat badly even if it looks close.
- Insert a new universal 80/12 needle for medium woven cotton, or change the size and type for the fabric: 70/10 for lighter cloth, 90/14 for heavier woven fabric, ballpoint or stretch for knits.
- Put in a full bobbin wound evenly. If the bobbin is lopsided, noisy, or overfilled, rewind it.
- Thread the upper path with the presser foot raised so the thread sits between the tension discs.
- Lower the presser foot, hold both thread tails behind the foot for the first 2 to 3 stitches, and sew a sample at medium speed.
The best baseline settings are usually the boring ones: straight stitch, middle needle position, stitch length around 2.5 mm for standard seams, and moderate tension as recommended in the manual. Decorative stitches, automatic buttonholes, and very short stitch lengths can hide the real problem.
Do not oil a modern machine unless the manual explicitly says to. Many newer domestic models are marked “self-lubricating” or sealed in specific areas. Too much oil can stain fabric and attract lint. If the manual names oil points, use the exact oil specified or a clear sewing-machine oil, not household oil.
The strongest setup clue is the test stitch. On medium cotton, you want the lockstitch to meet in the middle of the layers, with no loops above or below and no puckering. If the machine cannot do that on plain woven cotton after a fresh needle and full rethread, there is a real fault to chase.
Quick check: if you cannot remember the last time the needle was changed, or if the bobbin wound unevenly, start the setup from scratch instead of adjusting tension.
Why is my sewing machine making loops, birdnesting, or broken thread?
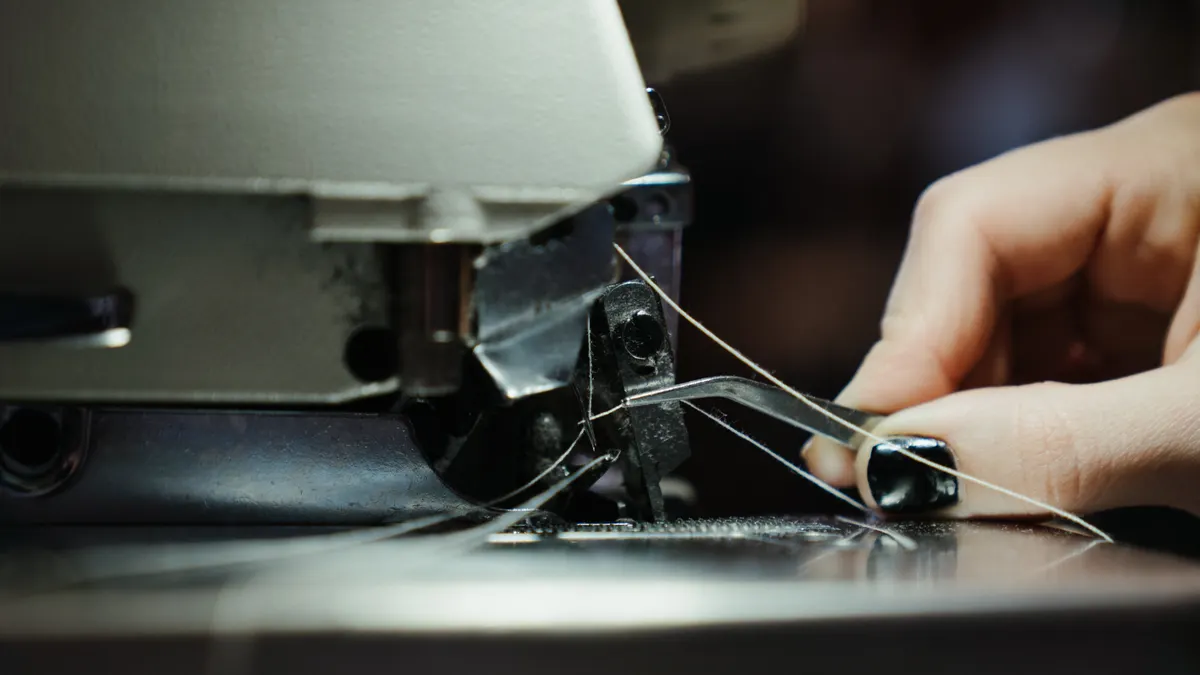
Loops and birdnesting usually mean the threading path, bobbin orientation, or tension balance is wrong. If the thread bunches into a snarled nest under the fabric at the start of a seam, the first suspect is the upper thread path, not the bobbin tension screw.
The reason is simple: the top thread has to seat between tension discs and pass every guide in the right order. If the presser foot was down while threading, the discs may never have opened. If the thread slipped out of the take-up lever, the stitch will look unstable even though the needle moves normally. If the bobbin is inserted backward on a front-loading or drop-in system, the machine can produce a mess that looks like a tension failure.
Use this branch when the underside looks like spaghetti or the thread snaps after a few stitches:
- Raise the presser foot and remove the top thread completely.
- Remove the bobbin, inspect it for uneven winding, and reinstall it in the correct direction for your model.
- Install a new needle, because a burr or slight bend can shred thread even when the eye looks fine.
- Re-thread the upper path slowly, making sure the thread enters every guide and the take-up lever.
- Lower the foot, hold both thread tails behind the foot, and sew 5 to 7 cm on scrap fabric.
- If loops remain on the underside, increase upper tension one step at a time and retest.
If the thread breaks near the needle eye, check three things before changing tension: needle size, needle condition, and thread type. A fine 60 wt thread on a coarse 100/16 needle, or a thick topstitch thread through a small eye, can snap for purely physical reasons. Metallic thread is especially unforgiving and often needs a larger eye or slower speed.
If birdnesting happens only at the start of the seam, your start technique is probably the issue. Hold both thread tails for the first few stitches, sew a short chain into the fabric rather than starting right at the edge, and make sure the presser foot is down before you press the pedal. Starting with the foot up can produce instant chaos on many domestic models.
Do not assume lower-thread tension is the culprit unless the bobbin case has been visibly damaged or the machine has a known bobbin-tension adjustment. On many machines, the bobbin tension is not the first thing to touch, and turning the tiny screw without a baseline is how a small issue becomes a bigger one.
Quick check: if the tangle appears under the fabric right at the first stitch, focus on threading and startup technique before you touch the bobbin screw.
What should you do if the stitches are uneven or the fabric puckers?
You should match the needle, stitch length, and presser foot pressure to the fabric before you blame tension. If the seam puckers like gathered fabric, the machine may be pulling too hard through a too-short stitch, or the needle may be too large for the cloth. If stitches are uneven in length, the feed dogs may be struggling with slippery, sticky, or layered material.
This is where generic advice fails. “Adjust the tension” does not solve chiffon, denim seams, quilting layers, or knit hems in the same way. The right answer depends on how the fabric behaves under the foot.
For woven cotton, a standard baseline is a universal 80/12 needle and a stitch length around 2.5 mm. For lightweight fabric such as voile or lawn, move down to a finer 70/10 needle and avoid very short stitches that perforate the cloth. For denim or several thick layers, go up to a 90/14 or 100/16 needle and slow down. For knits, use a ballpoint or stretch needle so the point slides between loops instead of cutting them.
If you have a machine with adjustable presser foot pressure, reduce pressure for light fabrics and increase it for thick, slippery, or multi-layer seams. Too much pressure can leave drag marks or create unnecessary feed resistance. Too little pressure can let the top layer shift.
The more reliable troubleshooting path looks like this:
- Sew a test strip with the same number of layers as the project.
- Inspect whether puckering happens before or after the stitch forms.
- If the fabric gathers before stitching, reduce pressure and lengthen the stitch by 0.5 mm.
- If the seam looks tight but flat, lower upper tension slightly.
- If the needle leaves visible holes or runs, switch to a finer needle.
- If the feed is uneven on layered seams, use a walking foot or engage one if your model has it.
A walking foot is not magic, but it is the right tool for two common jobs: quilting and sewing layers that want to shift against each other, such as plaid or slippery lining. It feeds the top layer more evenly. A Teflon or nonstick foot helps with vinyl, faux leather, and coated fabrics that grab under a standard metal foot, and for quilting on slippery layers it can keep the foot from dragging.
One honest limit: if the fabric itself is fragile, no setting will make a heavy seam disappear. Very fine silk, sheer synthetics, and loosely woven cloth can pucker because the material cannot tolerate dense stitching. In that case, use finer thread, longer stitches, less pressure, and stabilizer if the project allows it.
Quick check: if the seam looks like ruffling, the fabric and stitch are mismatched; if the stitches are the right shape but the length varies, the feed path is the problem.
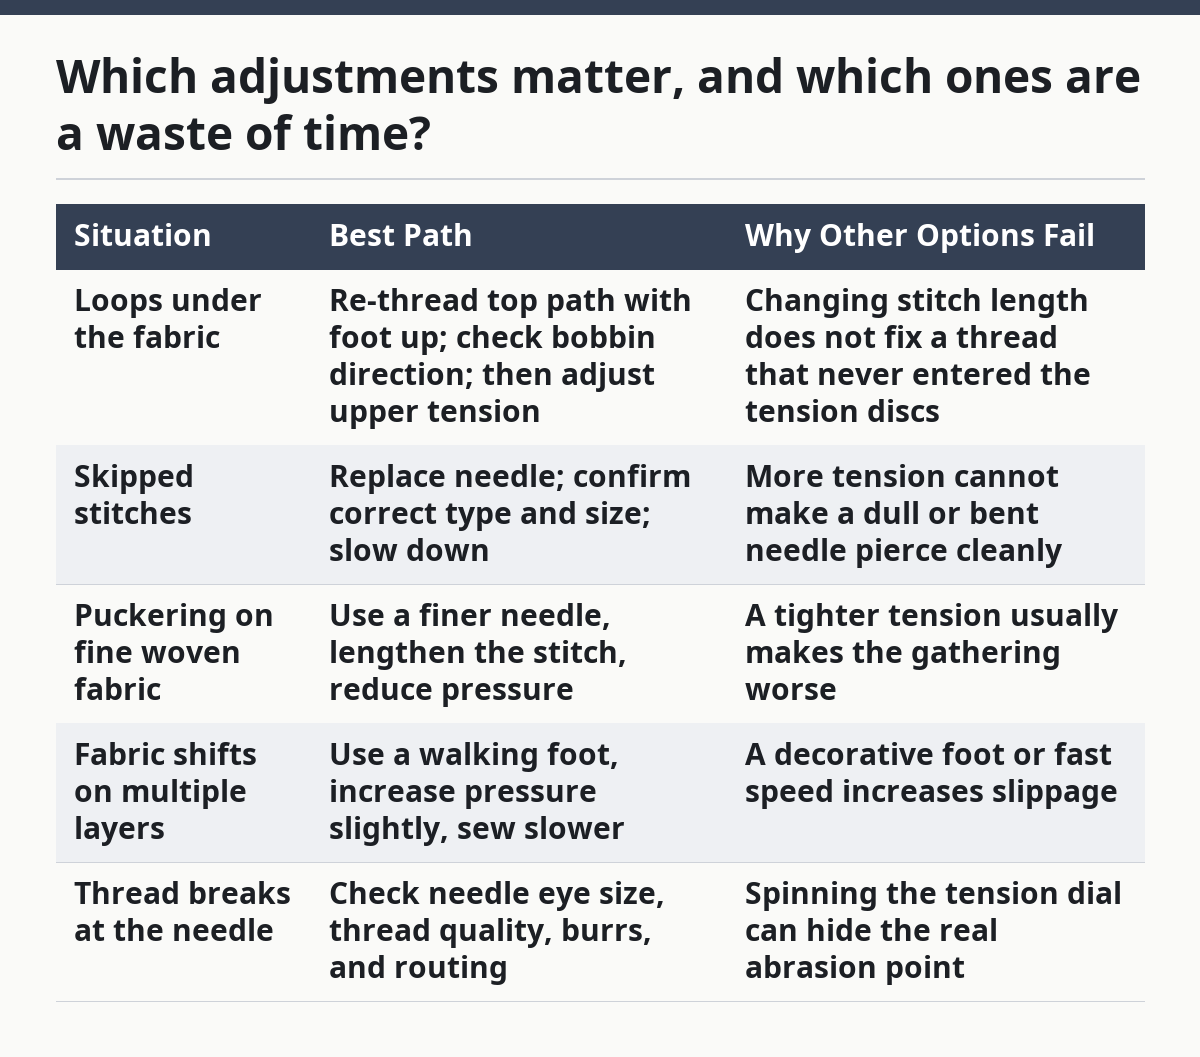
Which adjustments matter, and which ones are a waste of time?
The useful adjustments are needle, threading, bobbin orientation, tension, stitch length, presser foot pressure, and feed control. The waste of time is random knob turning without a symptom to match. If you do not know what changed, one setting at a time is the only way forward.
Here is the short version of what each control actually does:
| Situation | Best Path | Why Other Options Fail |
|---|---|---|
| Loops under the fabric | Re-thread top path with foot up; check bobbin direction; then adjust upper tension | Changing stitch length does not fix a thread that never entered the tension discs |
| Skipped stitches | Replace needle; confirm correct type and size; slow down | More tension cannot make a dull or bent needle pierce cleanly |
| Puckering on fine woven fabric | Use a finer needle, lengthen the stitch, reduce pressure | A tighter tension usually makes the gathering worse |
| Fabric shifts on multiple layers | Use a walking foot, increase pressure slightly, sew slower | A decorative foot or fast speed increases slippage |
| Thread breaks at the needle | Check needle eye size, thread quality, burrs, and routing | Spinning the tension dial can hide the real abrasion point |
Presser foot pressure matters more than many manuals admit, especially on lightweight fabrics and thick seams. Too much pressure compresses the layers and can make the machine drag. Too little pressure lets the fabric skate. If your model has no pressure dial, you have less control and may need a different foot or stabilizer.
Stitch width matters only if you are using zigzag, satin stitch, or a decorative pattern. On straight stitch, width should usually be zero or the machine’s straight-stitch setting. If you accidentally leave the width on a wider setting, the needle can hit the plate or foot and break.
Needle plate and feed dogs matter too. A straight-stitch plate has a smaller needle hole and supports fine straight seams better than a wide zigzag plate. If your machine comes with a straight-stitch plate, use it for precision work. Clean feed dogs pull fabric; linty feed dogs slip. That is not a theory problem, just physics.
Quick check: if you are adjusting three knobs and still guessing, stop and identify the symptom first. The symptom tells you which control matters.
When should you stop troubleshooting and service the machine?
You should stop home troubleshooting when the same fault survives a fresh needle, proper threading, correct bobbin setup, and a clean test on suitable fabric. If the machine still skips stitches, sounds harsh, or refuses to form a lockstitch after those basics, the problem may be timing, a damaged hook, a worn bobbin case, or another mechanical issue.
That is the point where forcing the settings helps nobody. A home fix cannot correct a timing problem well, and repeated sewing can worsen a burr or jam. If the handwheel feels stiff when turned with the power off, or if the needle hits metal, stop immediately. Those are repair-shop signs, not “try one more tension change” signs.
Use this decision path:
- Replace the needle and confirm the correct size and type for the fabric.
- Strip and rethread the machine with the presser foot raised.
- Confirm the bobbin case sits correctly and the thread pulls smoothly.
- Clean lint from the hook area and feed dogs.
- Test on medium woven cotton with stitch length 2.5 mm and normal speed.
- If the fault remains, stop adjusting and schedule service.
A service check is especially sensible if the machine is older, has recently been dropped, or has spent years without maintenance. Domestic machines can accumulate lint, dried oil, or a slightly knocked-out alignment. Industrial-style machines and some computerized models can also show sensor or feed issues that are not obvious from the outside.
If you are dealing with computerized error codes, follow the manual for the exact model number. A generic “unplug it and plug it back in” reset can clear a temporary lockup, but it will not fix a jammed hook assembly or a thread sensor fault. On some machines, error codes point to the needle position, cover interlock, or bobbin area. The manual is the only reliable map.
One honest limit: a home user can solve many threading and stitch-quality problems, but not every mechanical problem. A machine that runs for 30 seconds and then locks up, grinds, or throws repeated error messages may need professional work. That is not failure; it is the right cutoff.
Quick check: if the same problem survives a fresh needle, a clean bobbin area, and a correct rethread, the machine needs more than basic setup.
What changes in the edge cases?
The usual advice breaks down when the fabric, thread, or model is unusual. If you are sewing one of these situations, the standard “universal needle and moderate tension” answer is too vague and often wrong.
Here are the cases where the normal path changes:
| Situation | What Changes | What to Do Instead |
|---|---|---|
| Very thick seams, like jeans hems | The needle must penetrate multiple dense layers | Use a denim needle, shorten the seam approach speed, and help the fabric level with a hump jumper or folded scrap |
| Knits and T-shirts | The fabric stretches instead of staying flat | Use a ballpoint or stretch needle, longer stitch length, and a stretch stitch or narrow zigzag |
| Sheer or delicate fabric | Needle holes are visible and puckering happens fast | Switch to a finer needle, fine thread, longer stitch, and lower pressure; add stabilizer if needed |
| Topstitching with thick thread | The thread needs a larger path through the needle eye and tension discs | Use a topstitch needle or larger eye, reduce speed, and test tension on scrap |
| Vinyl, leatherette, or coated fabric | The foot can stick and the feed can drag | Use a nonstick foot or Teflon foot, longer stitch, and avoid pin holes when possible |
| Computerized machine with error code | The machine may be sensing a jam, open cover, or bobbin issue | Check the exact code in the manual and clear the cause before restarting |
If you are sewing denim, the biggest mistake is trying to force the needle through a bulky seam at full speed. Slow down, support the level change with a hump jumper, and use a heavier needle such as 90/14 or 100/16 if the fabric demands it. If you are sewing knits, the biggest mistake is using a sharp universal needle and a straight stitch that cannot stretch with the seam.
For vintage machines, the caution is different. Some older models like careful cleaning, specific oiling points, and in some cases older needle systems or feet. If the machine is vintage and the manual is missing, identify the exact model before guessing. Parts and needle compatibility vary enough that a generic fix can miss the mark.
If the machine jams only with one thread brand, the thread quality may be the problem. Cheap thread sheds lint and can break more easily. That does not mean the machine is at fault. Consumer Reports and sewing-machine manufacturers both note that thread quality can affect stitch consistency and breakage.
Quick check: if your project is denim, knit, sheer, coated, or vintage, follow the fabric-specific path instead of the standard cotton baseline.
A simple troubleshooting order that saves the most time
You should follow a strict order because random fixes waste time and can make the fault harder to read. If you want the shortest route from bad stitches to clean seams, use this order every time: needle, threading, bobbin, fabric match, then tension and service.
Start with the needle because it is the cheapest variable and the most frequently wrong. Replace it if it is bent, blunt, or simply old enough that you do not trust it. Then rethread the entire upper path with the presser foot up. After that, remove and reinstall the bobbin, checking the thread direction and the case seating. Then test on the right fabric with the right stitch type. Only after that should you start fine-tuning tension or pressure.
A useful bench test is a 10 cm seam on the same fabric layers you plan to sew. If you are making a bag or jeans hem, a single layer of cotton is a misleading test. Sew the real stack. Inspect the top and bottom stitches under good light. You want balanced lockstitch formation, no loops, no skipped stitches, and no thread buildup in the needle plate area.
If you still cannot get the result you want, the machine may be asking for maintenance rather than settings. Clean lint from the hook race and feed dogs, check for burrs on the needle plate, and listen for scraping or clunking that points to a mechanical issue. If the handwheel feels normal but the stitch quality never stabilizes, service becomes the honest answer.
That is the main judgment here: setup solves most problems; troubleshooting solves the rest; forcing a bad machine to “behave” is the wrong fight. This guide is not for someone who wants a magic dial setting for every fabric. It is for the person who wants a repeatable way to find the actual cause and stop wasting bobbins.
Quick check: if you want one rule to remember, it is this—replace the needle, rethread the machine, test on the real fabric, and only then touch tension.
Drafted with AI; not yet reviewed by a person.