Last updated: November 20, 2026
Quick answer: for most home sewing projects, a setup built around 4 essentials — the right fabric match, the right stitch set, the right table and chair height, and the right light — is the most practical place to start. Choosing the right sewing machine and setup — The Complete Guide starts with what you sew most, how thick your fabric stack is, and how much space you have for the table, light, chair, and pedal. A beginner hemming cotton needs a very different setup from someone sewing denim, quilts, or a lot of stretch fabric. The best answer is often not “the fanciest model,” but the one that matches your projects, your room, and your body.
Key takeaways
- Start with fabric type and project type, not brand hype.
- A basic straight-stitch path works for many people; heavy denim or stretch changes the answer fast.
- The chair, table height, light, and foot control matter as much as the sewing unit.
- A weak setup can make a good machine feel bad.
- The wrong choice is usually the one with more features than the sewer will actually use.
What actually matters most?
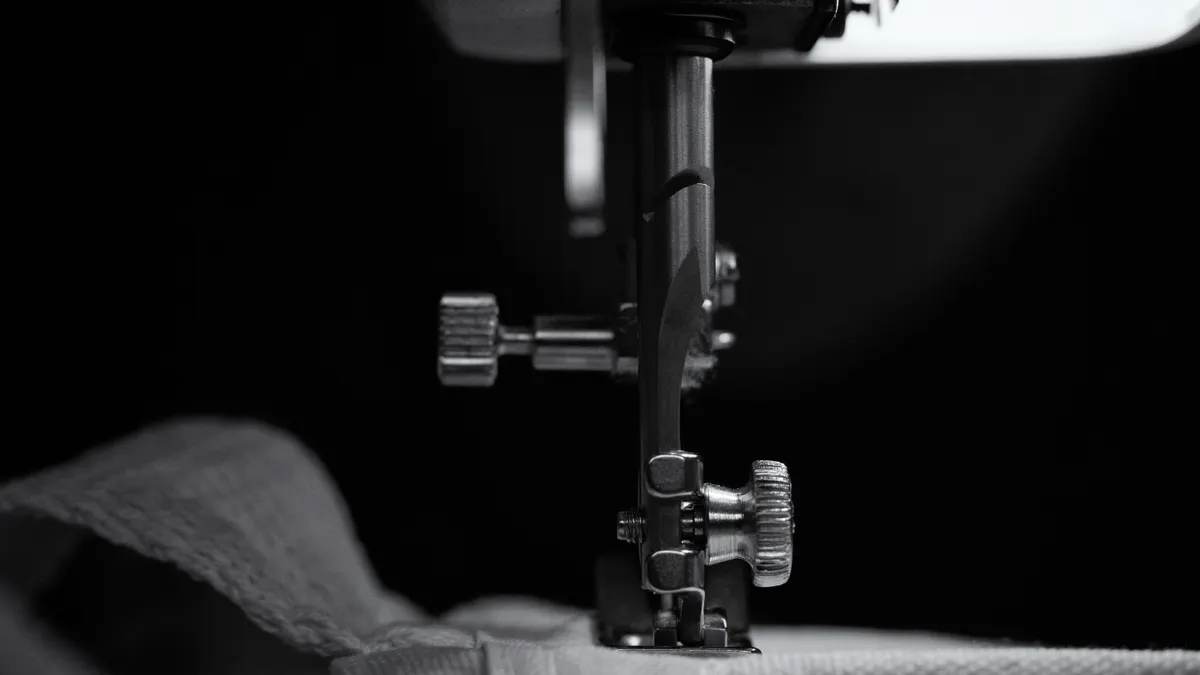
The right sewing machine and setup comes down to four things: the fabric, the stitches needed, the space available, and the sewer’s comfort. If those four fit, the rest is easier to sort out. If they do not, even a well-known model can feel like the wrong tool.
If the main goal is simple repairs, cotton work, or beginner practice, a basic machine with straight stitch, zigzag, adjustable stitch length, and a reliable presser foot pressure setting is often enough. If the goal is thick seams, denim hems, or upholstery-like layers, then needle power, motor strength, and clearance under the foot matter more than a long list of decorative stitches.
The common mistake is buying for the feature list instead of the work. A machine with 200 stitches sounds impressive, but a person hemming curtains in a small apartment may care more about a stable table, a bright task light, and a pedal that does not creep across the floor. A setup that fits the room and the job is usually better than a feature-heavy box that stays in storage.
For this decision, think in terms of fit, not status. The right setup should let the fabric feed evenly, let the hands stay out of the way, and keep the back and shoulders from tightening after 20 minutes. That last part matters more than many buyers expect, and it is one reason ergonomics guidance from OSHA and CDC/NIOSH is worth checking before you decide:
https://www.osha.gov/ergonomics
https://www.cdc.gov/niosh/topics/ergonomics/
Quick check: If the projects are simple and the space is limited, the answer usually points to a straightforward machine with a careful setup, not a premium bundle.
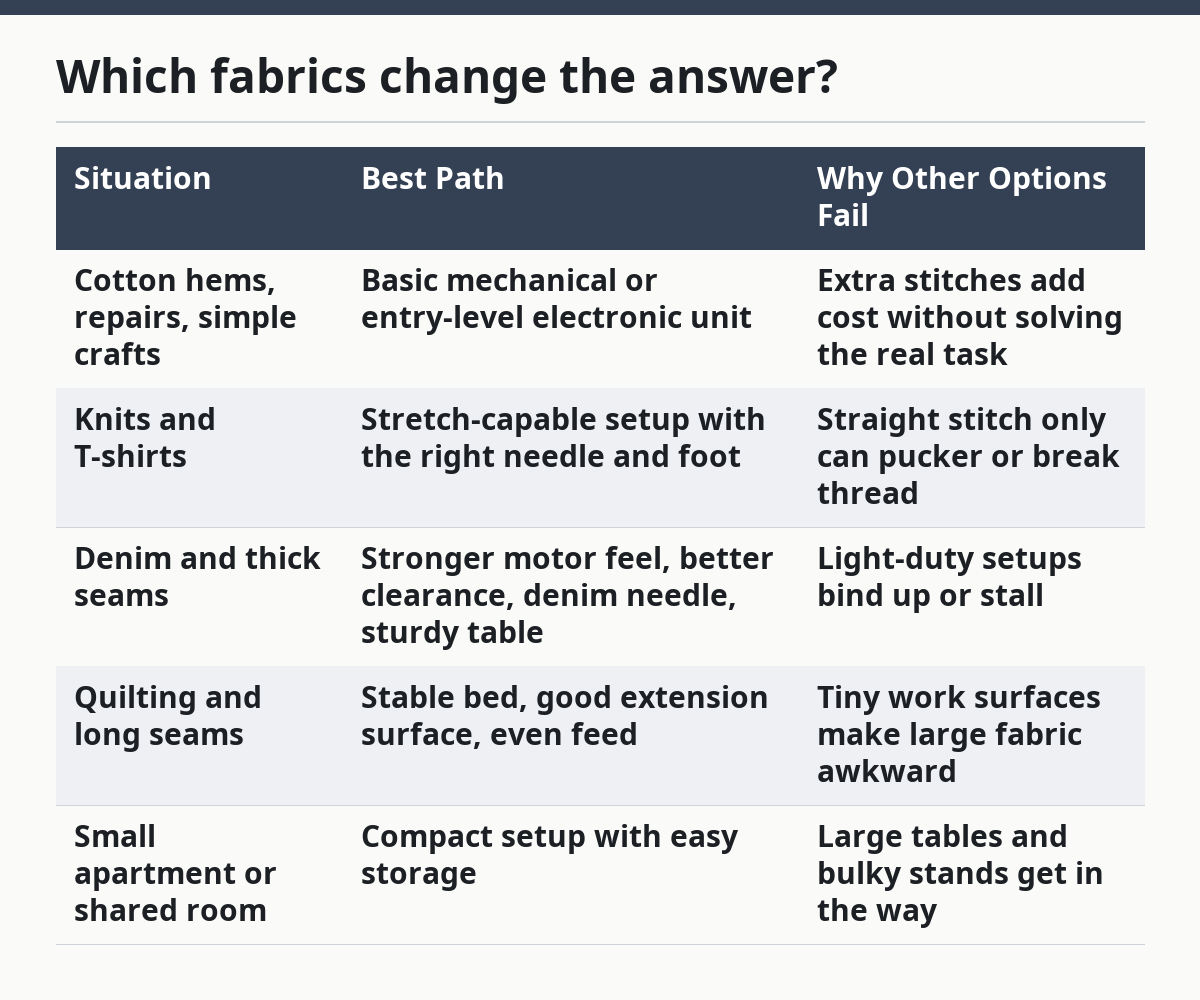
Which fabrics change the answer?
If the main fabric is lightweight cotton, the answer stays simple; if the fabric is denim, knits, or layered seams, the answer changes. Fabric thickness and stretch decide more than most beginners think. A unit that handles quilting cotton well may struggle with slippery rayon or a hem made from several layers of denim.
For light woven fabric, look for clean straight stitch quality, easy tension control, and a standard zigzag. That covers most mending, apron work, tote bags, and beginner garments. For knits, the real test is whether the setup can handle stretch without wavy seams or skipped stitches. That usually means stretch stitches, the right needle type, and a walking foot or similar aid when needed.
For thick materials, the throat space and presser foot clearance become important. A narrow arm and a weak motor can make bulky seams frustrating. In that case, a machine with better clearance and stronger feed is a better fit than a model loaded with decorative patterns.
One useful rule is that if the project regularly stacks more than one thick layer, it is wise to treat the setup as part of the tool choice and, if needed, consult a qualified sewing instructor or dealer. That means the needle size, thread choice, foot type, and table height all matter together. A perfectly capable unit can still perform badly if the needle is too fine or the table is too low; as a practical matter, checking those details first can help prevent spending extra on features that will not be used, especially if you compare them against a dealer’s guidance or the machine manual.
| Situation | Best Path | Why Other Options Fail |
|---|---|---|
| Cotton hems, repairs, simple crafts | Basic mechanical or entry-level electronic unit | Extra stitches add cost without solving the real task |
| Knits and T-shirts | Stretch-capable setup with the right needle and foot | Straight stitch only can pucker or break thread |
| Denim and thick seams | Stronger motor feel, better clearance, denim needle, sturdy table | Light-duty setups bind up or stall |
| Quilting and long seams | Stable bed, good extension surface, even feed | Tiny work surfaces make large fabric awkward |
| Small apartment or shared room | Compact setup with easy storage | Large tables and bulky stands get in the way |
If the fabric mix is wide and unpredictable, then a middle-ground unit is often safer than a bare-bones one. But if the sewing is mostly one type of cloth, choosing for that fabric is smarter than buying for every possible project. A machine that is “good at everything” often ends up being merely average at the thing that matters most.
Quick check: If the stack includes knit, denim, or multiple layers, the fabric itself is driving the decision.
How do I choose the right sewing machine?
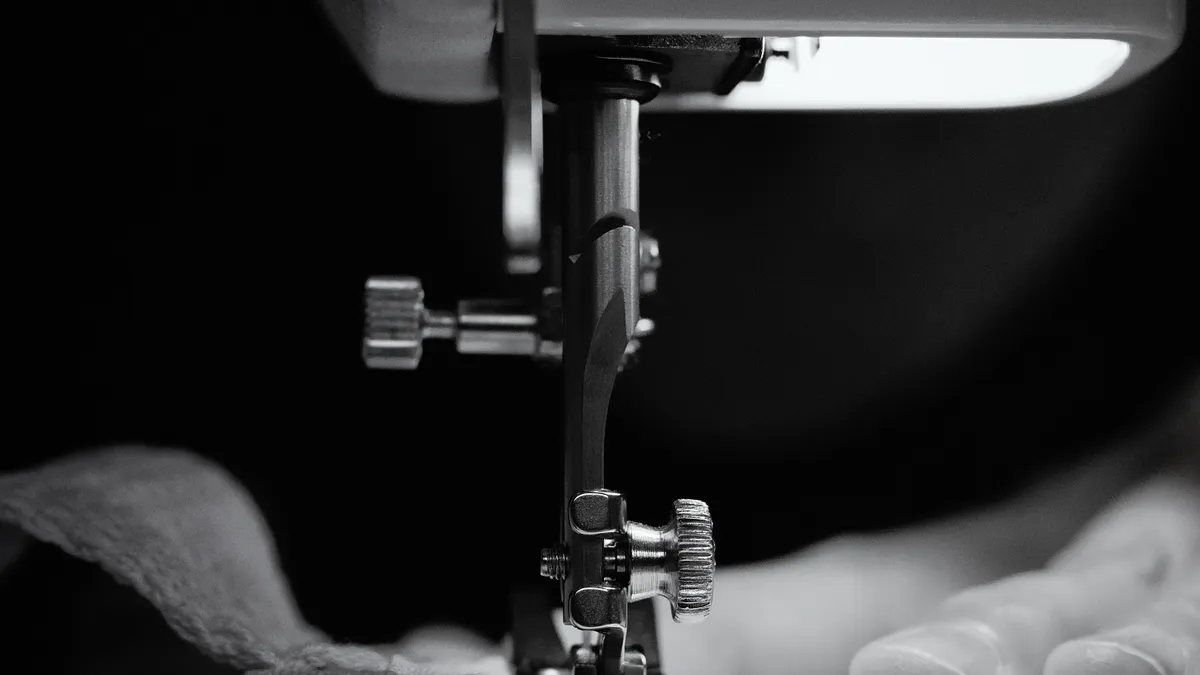
The right choice is the one that matches the main project list and the skill level. Start with the projects, then narrow to stitch needs, then check the controls and maintenance needs. That order can help reduce overspending on features that will not get used, especially when you compare the options with a trusted dealer, sewing instructor, or the machine manual.
Here is a practical path:
- List the top three project types: repairs, garments, quilts, bags, or heavy fabric work.
- Mark the hardest fabric in that list, such as knit, denim, or layered cotton.
- Decide whether basic straight and zigzag stitches are enough or whether stretch and buttonhole stitches are needed.
- Check the throat space, presser foot clearance, and feed system for the fabric thickness.
- Compare the control layout: speed slider, stitch dial, bobbin loading, thread path, and needle threading.
- Choose the option that is easiest to maintain, clean, and thread, not the one with the longest spec sheet.
The difference between mechanical and electronic matters here. A mechanical model usually gives simple controls and a more direct feel. An electronic model often adds a wider stitch menu, one-step buttonholes, and easier settings. Neither is automatically better. A person who wants fewer parts and simple repair work may prefer mechanical. A person who wants faster setup and more stitch choices may prefer electronic.
The brand name matters less than the fit for the work. A basic model from a known brand can be a better buy than a heavy feature list from a random line. What matters is whether the unit feeds fabric evenly, handles the thread type, and can be serviced if something goes wrong.
Also check the manual before buying. A clear manual, even a 40-page one, often saves more time than one extra decorative stitch. If the needle chart, threading steps, and bobbin path are confusing in the manual, the daily use will likely feel confusing too. For that reason, manufacturer documentation and support pages are worth reviewing alongside any store demo.
Quick check: If the decision is still fuzzy, write down the hardest fabric and the most common project; those two answers usually reveal the right path.
What setup matters as much as the machine?
The setup matters as much as the machine because a poor workspace can make a good unit behave badly. The table, chair, light, pedal, and presser foot all affect stitch quality and comfort. Many sewing problems are setup problems first.
The surface should be stable and at a height that lets the elbows rest without hunching. If the shoulders rise or the wrists bend sharply, the setup is fighting the body. A chair that sits too low can cause reaching; one that sits too high can press the feet awkwardly into the pedal. That discomfort spreads fast over a 30-minute session.
Lighting matters more than people expect. A bright task light aimed at the needle area cuts eye strain and makes thread breaks easier to spot. If the room light throws a shadow over the needle plate, place the lamp where it reduces shadows over the work area, not where it looks neat. Good light can matter as much as a more expensive presser foot.
The pedal should stay in place and respond smoothly. If it slides, place it on a grippy mat or surface. A jumpy pedal makes speed control harder, which is a problem when starting, pivoting, or sewing near a seam crossing. Foot control should feel predictable, not twitchy.
Thread path and needle choice are part of setup too. The wrong needle can cause skipped stitches or thread damage even when the unit is fine. For heavier fabric, a sturdier needle makes a bigger difference than many beginners expect. For knits, the correct needle type helps stop skipped stitches and snagging, and sewing-machine manuals from major manufacturers usually treat those choices as part of normal setup.
A simple setup checklist helps:
- Set the table so the forearms rest comfortably at the work surface.
- Adjust the chair so the feet reach the floor or the pedal without strain.
- Place a task light to the left or right, depending on hand preference, so the needle area is bright.
- Keep the pedal from slipping with a mat or a stable base.
- Match the needle, thread, and foot to the fabric before starting the seam.
- Test on a scrap piece at the same thickness as the final project.
If the setup is wrong, the most expensive unit can feel disappointing. If the setup is right, a modest machine often feels much better than expected.
Quick check: If the neck, shoulders, or wrists hurt after 15 to 20 minutes, the setup needs attention before the machine does.
What is the right setup for a beginner?
The right setup for a beginner is the simplest one that can handle basic seams cleanly and safely. A beginner does not need a huge stitch library or a complicated control panel. The goal is to learn fabric control, seam allowance, thread tension, and troubleshooting without extra noise.
A mechanical or easy-to-read electronic unit with straight stitch, zigzag, reverse, adjustable stitch length, and a buttonhole option is often enough. That covers practice samples, hemming, simple garments, and small home projects. If the beginner plans to work mostly with cotton, that is usually enough to get started without regret.
The table below shows a practical comparison:
| Option | Best for | Main drawback |
|---|---|---|
| Basic mechanical model | Simple repairs and learning the basics | Fewer convenience features |
| Entry-level electronic model | Faster setup and more stitch options | More controls can confuse new users |
| Heavy-duty model | Thick seams, denim, and frequent use | Heavier, often costlier, and less friendly for small spaces |
| Computerized model | Users who want many stitches and easy selection | More complexity than a beginner may need |
For a beginner, the setup should include a clear manual, a flat work surface, a bright lamp, and a scrap-fabric habit. Testing on scrap cloth is not optional. It is one of the fastest ways to learn how the unit behaves before ruining the real piece.
A beginner also benefits from simple storage. Keep bobbins, needles, seam ripper, scissors, and a tape measure in one box. This saves time and reduces the false idea that sewing is hard because the tools are scattered. A small, organized kit makes practice more likely.
What this is not for: a beginner who wants to sew formalwear right away, or someone who expects the first project to be a thick zippered bag. Those goals push the setup toward more support, more practice, and in some cases a sturdier option.
Quick check: If the goal is learning, not production, keep the setup simple and the controls easy to read.
When is a heavy-duty setup the right call?
A heavy-duty setup is the right call when the work includes denim, canvas, multiple layers, or repeated long seams. That kind of sewing needs a stronger feel, better clearance, and a table that will not wobble. If the fabric is thin cotton only, a heavy-duty setup may be more than is needed.
The biggest mistake is assuming “heavy-duty” means “best.” It does not. A heavier unit can be less pleasant for light fabrics and can feel awkward in a small room. A thick-fabric setup should be chosen because the fabric demands it, not because the label sounds impressive.
If the work regularly includes thick hems, bags, or outerwear repairs, then the decision shifts toward power and stability. A denim needle, strong thread, a stable table, and enough room under the arm become part of the plan. A walking foot can help with layers that want to drift or stretch unevenly. In some cases, an extension table or wider support surface makes the sewing far easier.
The right path looks like this:
- Identify the thickest material in the project list.
- Choose a unit with enough clearance to move bulky seams under the foot.
- Pick needles and thread that suit denim or canvas, not just lightweight cotton.
- Use a table that does not shake when the fabric is pulled across it.
- Test seam starts, backstitching, and corner turns on scrap pieces first.
- Keep a seam ripper close, because thick fabric mistakes take longer to undo.
There is a limit here. If the work is industrial-level, or the fabric stack is far beyond home use, a home setup may be the wrong tool. That does not mean the machine is bad. It means the job is bigger than the category.
Quick check: If denim or canvas is the norm, choose for strength and support, not for decorative stitch count.
What setup problems get ignored too often?
The setup problems get ignored because they feel small at first, but they decide whether sewing is pleasant or miserable. Needle choice, bobbin winding, thread quality, and foot control are often treated like minor details. They are not minor when the thread keeps breaking or the seam starts looping.
Edge cases matter here because normal advice breaks down in specific situations:
- Very small work area: A large table or wide extension surface can become a problem. Use a compact surface, keep tools in one tray, and choose a unit that stores easily.
- Left-handed or awkward hand position: Light placement and pedal position may need to shift. Put the lamp where it reduces shadows, not where it looks neat.
- Frequent seam ripping or repair work: A simple thread path and easy bobbin access matter more than extra stitches. Time saved on rethreading is real.
- Mixed fabric projects: One project may switch from cotton to knit or from two layers to six. In that case, choose the setup for the hardest section, not the easiest one.
- Arm or shoulder strain: Table height, chair height, and pedal distance need correction before the unit is blamed. Ergonomic discomfort can make even short sewing sessions feel too long.
- Noisy shared space: A quieter-feeling setup and a stable table may matter more than a fast motor or a large feature list.
What changes in these cases is the priority order. Instead of shopping for more features, the answer becomes cleaner layout, easier threading, better lighting, or less bulk. That is why one-size-fits-all advice fails so often.
The right fix is usually practical, not dramatic. Move the chair by a few inches, switch to a better lamp, change the needle, or simplify the fabric path on the table. Small changes can produce a much bigger improvement than replacing the whole unit.
Quick check: If the real problem is not the stitch itself but the space, strain, or fabric mix, the setup needs to change first.
How do I compare options without getting lost?
The cleanest way to compare options is to ignore the long feature list and check the six things that affect daily use. That means stitch quality on the target fabric, ease of threading, bobbin access, foot control, table fit, and comfort over 20 to 30 minutes. If a model fails two of those, it is usually the wrong pick.
A comparison like this helps:
| Situation | Best Path | Why Other Options Fail |
|---|---|---|
| Learning basics on cotton | Simple model with clear controls | Complex menus slow down practice |
| Sewing knits | Stretch-ready setup with correct needle and foot | Straight-only options can pucker or skip |
| Denim hemming | Stronger feel and better clearance | Light-duty setups struggle with thick seams |
| Small room | Compact table and storage-friendly setup | Large furniture becomes a daily hassle |
| Long sewing sessions | Comfortable chair and stable height | Poor posture causes fatigue fast |
The comparison should also include maintenance. If bobbin access is hard, cleaning is awkward, or the thread path is confusing, daily use becomes annoying. A machine that is slightly less flashy but easier to maintain is often the better long-term answer.
This is where the “best” label gets slippery. Best for a craft room with plenty of space is not best for a dorm room. Best for quilts is not best for quick mending. Best for thick fabric is not best for a child learning the basics. The right option is the one that fits the actual use case.
The reader should be suspicious of any advice that ignores the room. A sewing setup is not only a tool; it is a small work system. When the chair, table, light, and foot control work together, the whole process gets easier.
Quick check: If the comparison is making the decision harder instead of easier, compare only the projects that will happen most often.
What should the final setup checklist include?
The final setup checklist should include the fabric, the foot, the needle, the light, the chair, the table, and the storage. If one of those is off, the whole session can feel worse than it should. This is the point where the choice becomes practical instead of theoretical.
Use this final pass:
- Confirm the main fabric type and the thickest seam.
- Match the needle type and size to that fabric.
- Pick the presser foot that suits the project, such as a walking foot for layers when needed.
- Set the table height and chair so the shoulders stay relaxed.
- Place a bright light on the needle area.
- Keep thread, bobbins, scissors, and a seam ripper within reach.
- Run a test seam on scrap fabric before the real piece.
A good setup is not flashy. It is the one that removes friction. The thread path is clear, the pedal behaves, the fabric feeds evenly, and the body does not have to fight the furniture. That is what makes sewing feel manageable instead of awkward.
There is one more honest limit: no home setup solves every problem. Some materials, some seam stacks, and some room layouts will always ask for compromise. The best choice is the one that makes the common work easy and the hard work possible.
Quick check: If the test seam looks good, the chair feels fine, and the room works, the setup is probably right.
FAQs
What is the best sewing machine for a beginner?
The best sewing machine for a beginner is usually a simple model with straight stitch, zigzag, reverse, and a clear thread path. A beginner does not need a long stitch list to learn control and seam basics. A clean manual and an easy bobbin system matter more than extra decorative options.
Do I need a heavy-duty sewing machine?
A heavy-duty sewing machine is worth it if the fabric is often denim, canvas, or stacked seams. If the work is mostly cotton repairs or simple garments, that kind of setup may be more than needed. The best choice depends on the thickest material, not the most common one.
Is a computerized model worth it?
A computerized model is worth it if easy stitch selection, one-step buttonholes, and more built-in options matter. It is less useful if the goal is simple sewing with fewer controls to manage. More features can help, but they can also slow down a beginner.
What setup matters most for comfort?
The chair height, table height, and light placement matter most for comfort. If the shoulders rise, the wrists bend, or the needle area is shadowed, the setup is working against the body. A stable pedal and a clear workspace also help a lot.
Should I buy for the fabric I use now or the fabric I want to use later?
Buy for the fabric that will actually get sewn most often, then leave some room for growth. If the current work is cotton and repairs, do not overbuy for a future project that may never happen. If thick fabric is already part of the plan, choose for that now.
The right sewing machine and setup is the one that fits the work, the room, and the body at the same time. If those three line up, sewing feels less like wrestling with gear and more like making something useful.
Drafted with AI; not yet reviewed by a person.