Last updated: November 18, 2026
Quick Answer: Tracing a sewing pattern without destroying it usually takes 10 to 15 minutes for a simple bodice front, and the safest way is to trace one pattern piece at a time on translucent paper while keeping the original flat and intact. This guide explains how to trace a sewing pattern without destroying it so you can preserve the master sheet and make a usable copy.
Tracing a sewing pattern without destroying it is the clean way to copy usable pieces from a multi-size sheet without cutting the original apart. It keeps the master intact, lets you preserve other sizes, and gives you a working copy you can mark, slash, or alter without regret.
Key takeaways
- Use tracing paper, not flimsy copy paper, if you want lines you can see through and a pattern that drapes better.
- Pattern weights keep the original flat; pins can distort the tissue and shift grainlines.
- Trace one pattern piece at a time, then transfer notches, darts, fold lines, and placement marks before you move on.
- If the original has multiple sizes, trace only the size line you need and ignore the rest.
- The original stays intact only if you copy every cut line, seam allowance cue, and notation before you lift the sheet.
What you need before you start
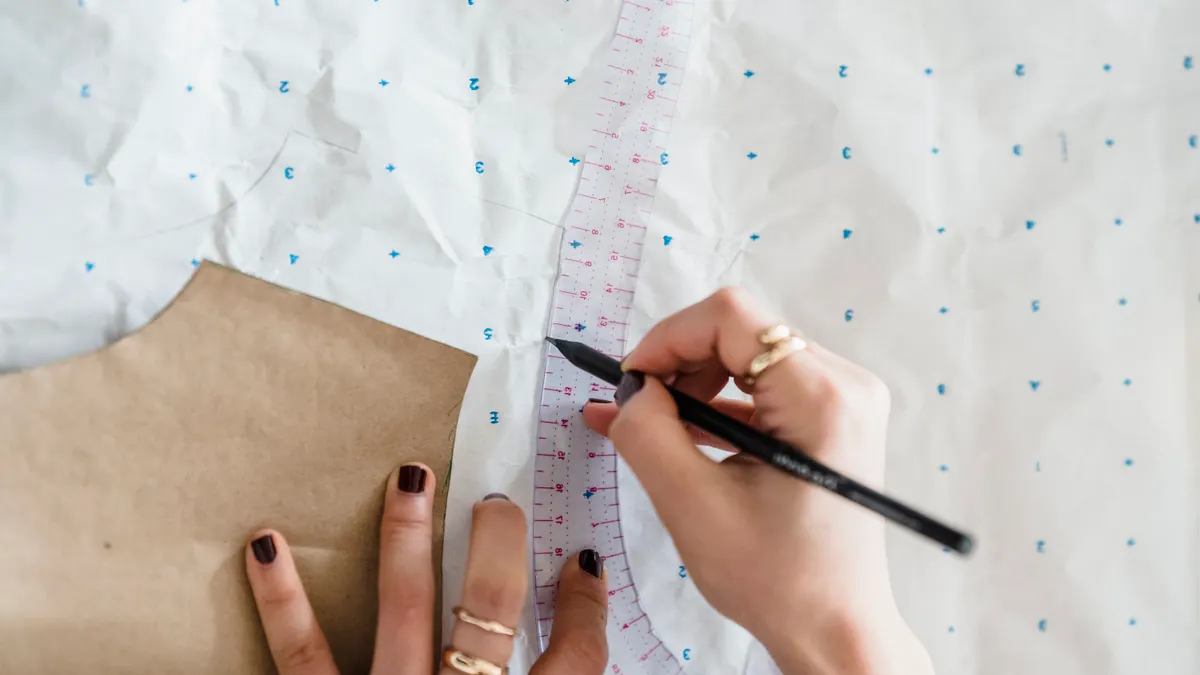
You need the original pattern sheet, tracing paper, pattern weights, a pencil, and a marker. A clear ruler, a tracing wheel, and colored pens help, but they are optional if the sheet is simple. A cutting mat or large flat table makes the job easier because pattern tissue wrinkles fast on a sofa arm or bedspread.
Put the original pattern on a hard, level surface and smooth it with your hands first. Then place tracing paper over the section you want to copy and hold both layers with 4 to 6 pattern weights around the edges. The paper should lie flat enough that the printed lines do not shift when you move your hand across it.
This method is for preserving a pattern, not for decoding it. If you still need help reading pattern symbols or choosing a size, use the Reading Sewing Patterns hub first and then come back to trace the piece you want.
One honest limitation: tracing takes longer than cutting. A simple bodice front may take 10 to 15 minutes; a nested pattern sheet with several sizes can take much longer. That time buys you a reusable master, which is the point of pattern tracing.
How do you trace a sewing pattern step by step?
Trace the pattern by copying the exact line you need, then transferring every marking before you remove the tracing paper. The goal is a second pattern that looks and behaves like the original, not a rough sketch.
-
Lay out one pattern piece and secure it with weights.
Put the original on your table, smooth the tissue, and place 4 to 6 pattern weights near the corners and curved edges. When it works, the printed lines stay still while you slide your tracing paper into place. If you are unsure how to handle a delicate tissue original, consult a sewing professional or trusted patternmaking guide before pressing down too hard; pattern weights are widely recommended for this step. -
Place tracing paper over the piece and align the key marks.
Center the tracing paper so you can see the whole piece, especially the grainline, notches, and any fold or cut-on-fold label. You should be able to read the main outline through the paper before you begin drawing. -
Copy the line you actually intend to sew.
Use a sharp pencil for the first pass so you can correct small wobbles, then go over the finished line with a marker if you want it darker. If the pattern includes several sizes, follow only the size you plan to use. The right result is one continuous outline, not a stack of competing lines. -
Transfer all markings while the layers are still aligned.
Mark notches, darts, pleats, dots, button placement, drill holes, and grainlines onto the tracing paper. A tracing wheel can help on dense areas, but a pencil is usually cleaner for tissue. When this step is done correctly, the traced piece will carry enough information to cut and sew without returning to the original sheet. For exact placement marks and related drafting conventions, consult a sewing pattern reference or patternmaking professional if the sheet is unclear. -
Add a label before you move to the next piece.
Write the pattern name, piece name, size, cut quantity, and any “cut on fold” note on the tracing paper. This prevents the common disaster of a pile of anonymous pieces that all look the same after 20 minutes. If you are tracing several pieces at once, label each one immediately so the set stays organized. -
Repeat for each required piece, then check the set together.
Trace front, back, sleeve, facing, pocket, or lining pieces one by one and compare their notches and matching points at the end. The set is accurate when corresponding seams appear to meet and the labels still match the original layout.
A useful habit: trace the biggest or most awkward piece first. Large pieces can shift more easily, and once you learn how the paper handles, the smaller pieces go faster.
How do I keep a multi-size pattern intact?

You keep a multi-size pattern intact by tracing only one size line and leaving every other size untouched. That matters on commercial patterns where 3 or 4 sizes may share the same sheet and the lines cross at the armhole, waist, and hip.
Start by identifying the size line you need, then follow that line all the way around the piece. Do not switch sizes halfway through because the line looks easier to see. On nested patterns, the line may move between dots and dashes, but the shape needs to stay consistent from shoulder to hem. If the sheet has 5/8 inch seam allowances printed at the edges, note that on your tracing so you know whether you are copying the stitching line or the cutting line.
For any piece that is partly cut on fold and partly single-layer, write those instructions directly on the tracing paper. That saves you from folding the original pattern later and wearing out the tissue. If you expect to use more than one size in the future, make a second traced copy or store the original flat in a large envelope or portfolio tube rather than refolding it into a tight square.
The trade-off is obvious: tracing a multi-size pattern is slower than cutting a single-size tissue, but it protects the sheet you paid for and keeps future fitting options open. This approach is wrong for someone who wants to cut fast and never use the pattern again. It is right for a sewer who knows a favorite bodice or sleeve will be traced more than once.
How to copy notches, darts, grainlines, and other markings
You copy markings by treating them as part of the pattern, not decoration. The outline alone is not enough for accurate sewing, because the marks tell you where pieces match, fold, and turn.
Use short pencil ticks for notches, a triangle or slash for dart legs if you prefer that style, and a straight arrow for grainline. Mark every placement point shown on the original, including pocket positions and buttonholes. If the pattern includes “cut 2,” “cut 1 on fold,” or “self-facing,” copy that text exactly onto the tracing paper in a clear corner.
When a line is faint, hold the paper and original against a bright window or a light box if you have one. That often makes a 1960s tissue pattern easier to read than trying to guess at a rubbed-out line under a dim lamp. For perforated marks, poke through with a pin and then connect the hole on the traced copy. The result should be a pattern piece that can be matched to its partner without rechecking the original every few minutes.
Do not invent marks that are not there. A generic article often encourages people to “fill in the rest,” but that can create errors at the neckline or hem. If the pattern is missing a mark because the tissue is damaged, replace only what you can verify from the adjacent pieces and the original drafting logic. If you cannot verify it, leave it blank and note the uncertainty on the copy.
What materials work best for tracing paper and pattern weights?
Tracing paper, translucent sewing tissue, and lightweight medical exam paper all work, but they serve different jobs. The choice depends on how durable you want the copy to be and how much detail the original contains.
Tracing paper is a standard choice when you want to see nested sizes and keep a fairly stable copy. It lets you view the original line underneath and usually accepts pencil well. Pattern tissue is lighter and closer to what many commercial patterns use, so it folds compactly and is good for repeated handling. Plain copy paper is the least convenient because it blocks the original, adds bulk, and can shift under curved pieces.
Pattern weights matter as much as the paper. Smooth metal washers, specialty sewing weights, or small wrapped objects can hold the sheet without puncturing it. Pins work in a pinch, but they leave holes and can distort delicate tissue if you use too many. For long edges, place weights every 6 to 8 inches so the paper stays flat where you need it most.
A pencil is usually the main tool because it leaves a clean line you can erase or adjust. A marker is useful only after you are sure of the line. Use a fine point, not a fat felt tip, or the line will creep outside the true edge and change the shape of the piece.
If you are tracing a pattern you plan to store for years, avoid anything acidic or very sticky. Tape and glue can stain the original or the tracing. Clean, dry paper and simple weights age better than shortcuts.
Common mistakes that ruin a traced pattern
The biggest mistake is tracing too loosely, which costs accuracy at every seam. A line that wanders even a few millimeters can throw off a sleeve cap or side seam. The fix is to trace slowly, keep the original flat with weights, and redraw the line only after you can see the whole curve.
Another common mistake is copying the shape but forgetting the markings. That costs time later because you have to hunt for the original again to find notch placement or fold direction. The fix is to build a habit: outline first, then marks, then labels, then one last check before you lift the tracing paper.
A third mistake is tracing every size line because the pattern looks busy. That creates a confusing copy and makes later cutting harder. The fix is to follow one size from start to finish and leave the others alone.
Finally, people often store traced pieces without labels. One unmarked sleeve and one unmarked bodice can waste an hour the next time you sew. Write the pattern name, piece name, and size on each copy before you put it away. A simple label now saves a lot of sorting later.
When tracing is better than cutting, and when it is not
Tracing is better than cutting when the pattern is valuable, multi-size, or likely to be reused. It is also the smarter choice if you want to keep a master copy for future adjustments or if the tissue is already fragile. On a 6-piece top pattern, a traced set gives you room to alter fit, shorten hems, or preserve a favorite size range without destroying the source.
Tracing is not worth the effort for a one-off muslin draft or a pattern you know you will never reuse. If the sheet is already torn beyond repair, tracing may add little value because the reference lines are unreliable. In that case, copying by hand from a clean source or replacing the pattern may be the better use of time.
The other limitation is speed. Tracing takes longer than cutting, especially on dense sheets with 3 or more nested sizes. That is the cost of preservation. If the question is “How do I keep this pattern alive for the next project?” tracing is the right tool. If the question is “How do I get fabric under the scissors tonight?” it may be the wrong one.
For a deeper overview of pattern structure before you copy anything, the Reading Sewing Patterns hub gives the background this page assumes. For sewing terms and pattern markings, the Sewing Patterns guide and the pattern sizing hub can help you keep the copy accurate before you cut fabric.
Why trace a sewing pattern instead of cutting it?
Tracing lets you preserve the original sheet and keep other sizes usable later. It also gives you a copy you can alter, mark up, or compare against future fittings without damaging the master. Cutting is faster, but it ends the pattern’s flexibility the moment the scissors open.
What can I use to trace a pattern?
Tracing paper is a common all-purpose choice, but pattern tissue, medical exam paper, and other translucent papers can work too. Use pattern weights to hold the original flat, and use a pencil for the first pass. A fine marker helps only after the line is confirmed. For a deeper explanation of pattern layout and markings, see the beginner sewing tools guide and the sewing pattern basics page.
How do I keep traced pieces accurate?
Keep the original flat, trace one size consistently, and copy every notch, dart, grainline, and label before lifting the paper. Accuracy improves when you use a hard table, 4 to 6 weights, and a sharp pencil. A final check against the original piece catches most errors before they become fabric mistakes. For additional reference, consult an authoritative sewing source such as the Sewing & Craft Alliance guide or a professional patternmaking resource before tracing a complex sheet.
Drafted with AI; not yet reviewed by a person.